Showing posts with label face. Show all posts
Sunday, March 3, 2013
Apply Your Foundation with Perfection
Does your foundation ever flake? Become uneven? Melt away? Slip and Slide throughout the day?
Taking the necessary steps when applying foundation in KEY to maintaining that flawless appearance.
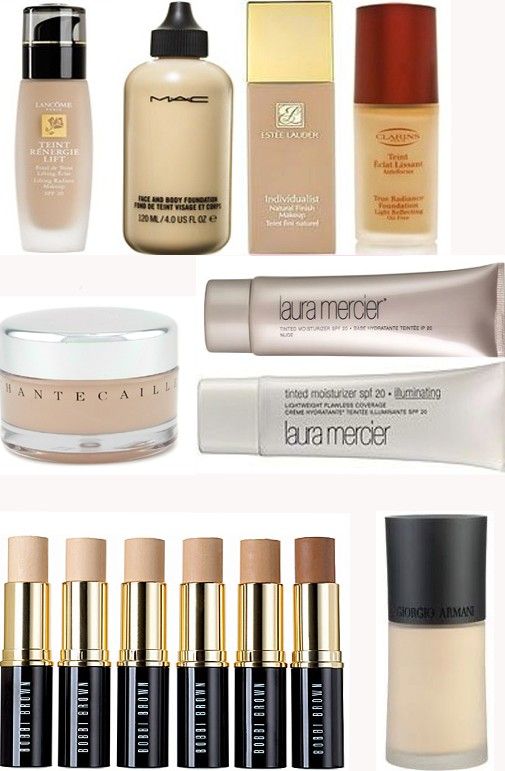
For me, I absolutely hate foundation. This hate is injected from several reasons, most stemming from the fact that absolutely no color blends into my pale skin.
However, beyond color corrections, I have found bare minerals + tinted moisturizer gives me the blended coverage I need. Which, is somewhat a powder foundation.
So, for ladies who yearn for Day-Long foundation coverage, check out the tips below to maintain perfect foundation throughout your haphazard days. Never suffer a day with a flaky face again!
1. CLEANSE prior to your application.
Why is cleansing important? Well, cleansing prior to your foundation application is crucial to maintain clear skin. Cleansing helps remove any dirt on your face that with otherwise be trapped between your skin and foundation.
2. TONE
toning removes excess dirt and cleanser left from over from Step one. Toning also tightens pores and smoothes skin to prepare it for foundation application.
3. MOISTURIZE
This step is probably the most important of all three. If you do this correctly, you really will get a flawless finish. Moisturizer actually allows the foundation to cling on to something, resulting in smoother, longer wearing makeup. Let your moisturizer sit for AT LEAST five minutes prior to applying your foundation. Foundation often slips, slides and flakes when you applied it to a moisturized face too quickly. Be patient.
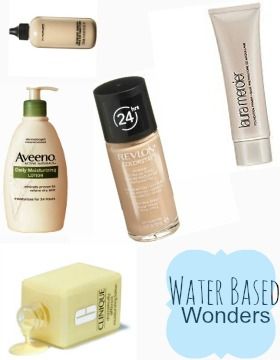
This is one of my key ingredients: USE THE RIGHT MOISTURIZER. That seems obvious to most, however, what many forget is that your moisturizer must correlate with your foundation. In other words, a water based moisturizer goes with a water based foundation. Likewise, an oil based moisturizer goes with an oil based foundation. Do NOT mix and match, this is a recipe for disaster.
How can you tell whether you are using oil or water? Check the ingredients. Normally, the first ingredient is water in a water-based lotion or foundation.
Monday, February 18, 2013
My Bag of Tricks- Product 1
Skin Care maintenance is probably one of the most sought after advices. Whether it be eye lashes, lips, makeup or cheeks, I try to maintain my glow by beginning at the root of the problem: the workings within.
Lately, I have had a few co-coworkers ask me about my skin care routine, my preferences, and how I maintain what they believe to be 'remarkable skin.' I am well aware of my own flaws so I invert a thank you and yield what I believe has been one of my top secrets.
Now, I have an entire bag of tricks. One product, one day aint gonna get chu anywhere. Most products take a month to make a difference, and what a difference it can make. Before we proceed, remember this-- EVERYTHING works from the inside out. A combination of things encompass great skin. However, there are a few things I do here and there and rev up results. Today we will go over product #1.
Jojoba Oil.
With these late bloomed snow storms, cold fronts and wind blown storms, it may seem like very little will pacify your harshened skin.
When it gets cold, crank up the hydration. Double up on your water, vitamins and take care of that wind burnt baby--your face. Many products claim hydration over night, anti-aging miracles, and even reduced lines. Maybe some do, but temporarily. My advice, LOOK what is in those ingredients. I try to stay all natural as much as possible to avoid harsh chemicals on my face.
Lather Up- Oils
Most oils on the street WILL make your face feel great, it may hydrate the skin temporarily. But what you dont know is what they contain. Many oil based products sold at your local drug store contain MINERAL OIL. Something I do my best to steer COMPLETELY clear of (which is hard with small pockets). Mineral Oil is a mass produced product made of distilled gasoline and crude oil. Yummy. It is clear, scentless and wildly produced. It acts as a thin layer on the skin and is actually quite difficult for the skin to absorb and in turn CLOGS THE PORES, which slows the skin's ability to eliminate toxins. REMEMBER, the skin is the body's largest organ and plays a vital role in maintaining overall health. SO although mineral oil based products may give you short term relief, think again about long term benefits. Be careful and ALWAYS research what you put on your face! That it probably my most valuable advice.
So, if you love oils like I do, go natural. Yes, you do have the risk of getting clogged pores, but it may be less likely than smothering toxic chemicals on your skin (we hope.). SO, back to Jojoba oil. You've seen this ingredient in many high end products, conditioners, lotions and more...
Here are the pros:
1. Non Greasy, I wear it on my forehead daily without looking like a grease monkey. It definitely soothes away my dry skin.
2. All natural
3. Great cleanser- I put jojoba on my face and then add cleanser so I feel that hydrated soothing silk.
4. Great eye makeup remover.
5.fantastic for eczema and Stretch marks
6. Good for locking moisture in and keeping bacteria out
7. Its actually a wax (just a fun fact)
Cons
1. You have to go to a whole foods to find an all natural bottle
2. It may not be as thick and hydrating as mineral oil and will be more expensive
I havent experienced any clogged pores or negative affects and I have been using this product for nearly two years. To learn more about the benefits of jojoba oil, see the link below.
I put this on my skin all over at night for extra absorption when I know my skin is starting to feel rough, I use it as a cleanser a few days a week and even put some in my conditioner and soap to help alleviate razor burn. Give it a try.
Youll find that when you finally hydrate your skin, many of your problems will fade away.
Again, trick one of many plus tons of water, exercise, eating clean and vitamins combined.
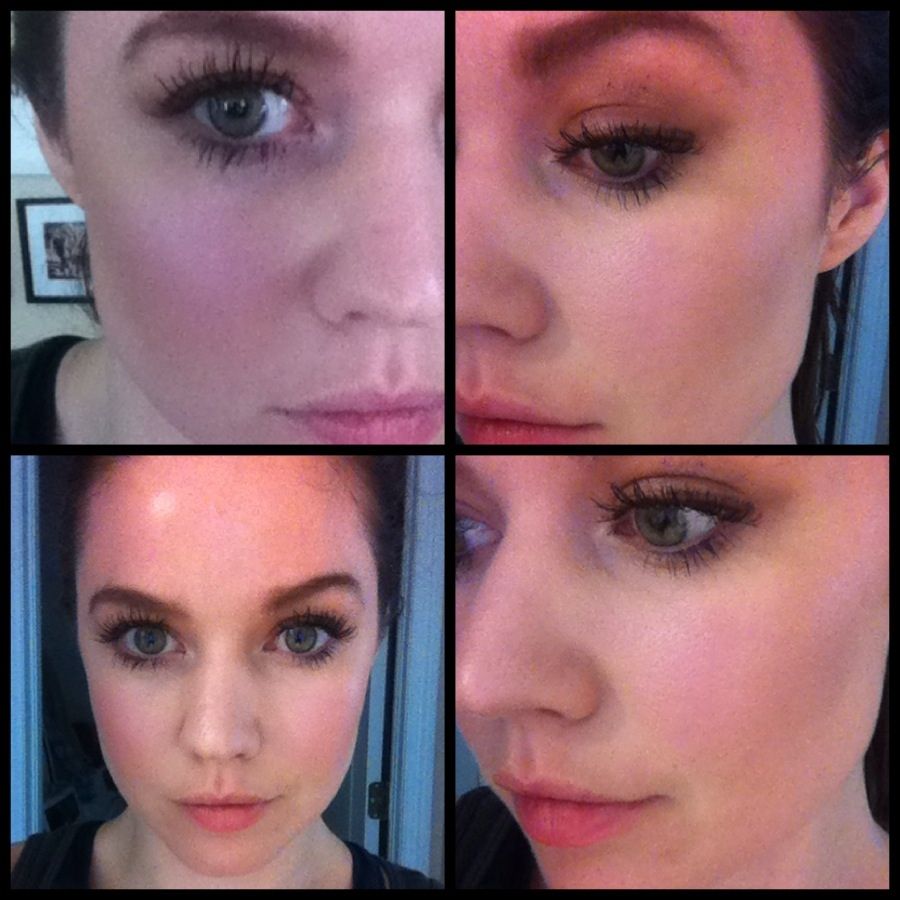
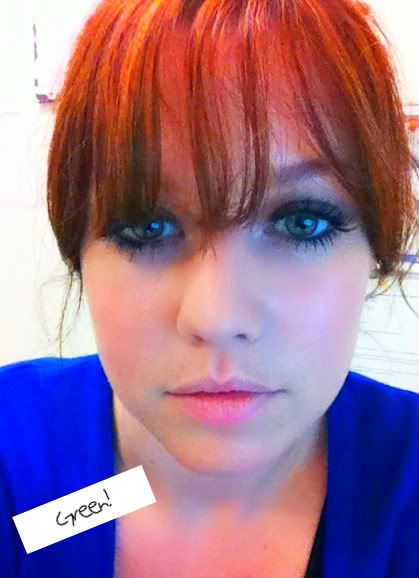
Excuse the awkward, I tried getting loads of close up pictures of my skin--flaws and all so you can see the affects of JOJOBA. (FYI my skin was dry and flaky yesterday, hydrated today after a night and cleanse with jojoba).
I am wearing Murad's Dewey Tinted Primer paired with bare mineral's mineral veil and a pop of Mac's pigment pink blush.
**Education yourself, before you apply, thats what Google is for, right?**
Quick jojoba Facts
A Great Jojoba Read
jojoba for acne
The more you know, the better skin you will have!
Lately, I have had a few co-coworkers ask me about my skin care routine, my preferences, and how I maintain what they believe to be 'remarkable skin.' I am well aware of my own flaws so I invert a thank you and yield what I believe has been one of my top secrets.
Now, I have an entire bag of tricks. One product, one day aint gonna get chu anywhere. Most products take a month to make a difference, and what a difference it can make. Before we proceed, remember this-- EVERYTHING works from the inside out. A combination of things encompass great skin. However, there are a few things I do here and there and rev up results. Today we will go over product #1.
Jojoba Oil.
With these late bloomed snow storms, cold fronts and wind blown storms, it may seem like very little will pacify your harshened skin.
When it gets cold, crank up the hydration. Double up on your water, vitamins and take care of that wind burnt baby--your face. Many products claim hydration over night, anti-aging miracles, and even reduced lines. Maybe some do, but temporarily. My advice, LOOK what is in those ingredients. I try to stay all natural as much as possible to avoid harsh chemicals on my face.
Lather Up- Oils
Most oils on the street WILL make your face feel great, it may hydrate the skin temporarily. But what you dont know is what they contain. Many oil based products sold at your local drug store contain MINERAL OIL. Something I do my best to steer COMPLETELY clear of (which is hard with small pockets). Mineral Oil is a mass produced product made of distilled gasoline and crude oil. Yummy. It is clear, scentless and wildly produced. It acts as a thin layer on the skin and is actually quite difficult for the skin to absorb and in turn CLOGS THE PORES, which slows the skin's ability to eliminate toxins. REMEMBER, the skin is the body's largest organ and plays a vital role in maintaining overall health. SO although mineral oil based products may give you short term relief, think again about long term benefits. Be careful and ALWAYS research what you put on your face! That it probably my most valuable advice.
So, if you love oils like I do, go natural. Yes, you do have the risk of getting clogged pores, but it may be less likely than smothering toxic chemicals on your skin (we hope.). SO, back to Jojoba oil. You've seen this ingredient in many high end products, conditioners, lotions and more...
Here are the pros:
1. Non Greasy, I wear it on my forehead daily without looking like a grease monkey. It definitely soothes away my dry skin.
2. All natural
3. Great cleanser- I put jojoba on my face and then add cleanser so I feel that hydrated soothing silk.
4. Great eye makeup remover.
5.fantastic for eczema and Stretch marks
6. Good for locking moisture in and keeping bacteria out
7. Its actually a wax (just a fun fact)
Cons
1. You have to go to a whole foods to find an all natural bottle
2. It may not be as thick and hydrating as mineral oil and will be more expensive
I havent experienced any clogged pores or negative affects and I have been using this product for nearly two years. To learn more about the benefits of jojoba oil, see the link below.
I put this on my skin all over at night for extra absorption when I know my skin is starting to feel rough, I use it as a cleanser a few days a week and even put some in my conditioner and soap to help alleviate razor burn. Give it a try.
Youll find that when you finally hydrate your skin, many of your problems will fade away.
Again, trick one of many plus tons of water, exercise, eating clean and vitamins combined.
Excuse the awkward, I tried getting loads of close up pictures of my skin--flaws and all so you can see the affects of JOJOBA. (FYI my skin was dry and flaky yesterday, hydrated today after a night and cleanse with jojoba).
I am wearing Murad's Dewey Tinted Primer paired with bare mineral's mineral veil and a pop of Mac's pigment pink blush.
**Education yourself, before you apply, thats what Google is for, right?**
Quick jojoba Facts
A Great Jojoba Read
jojoba for acne
The more you know, the better skin you will have!
Wednesday, January 23, 2013
Stay Put Travelers
For Christmas, or any occasion for that matter, there is no better gift than a Sephora gift card.
I am always searching for the next best product to help rejuvenate my skin and infuse a mini miracle muse on my face. To be honest, I do a fair amount of research before purchasing a product to avoid any guilt or buyers disappointment. I had been eyeing Benefit collections for quiet some time now and originally went in for Porefessional, which youtube showed definitely did its job. And, it does. Youtube scores once again for credibility.
I purchased these products over a month ago, but prolonged the review to make sure I still loved the products just as much as the day I bought them. As you know, these reviews are obviously outcome determinative.
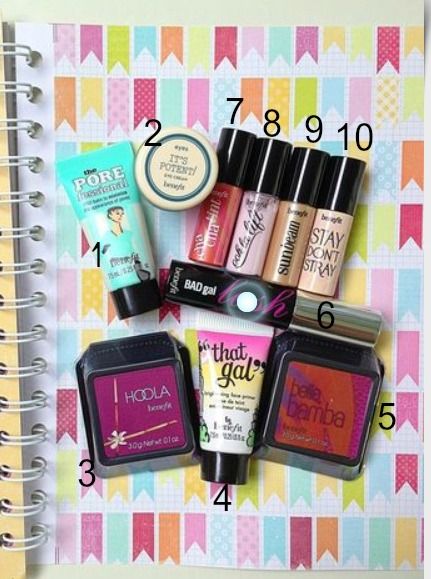
Instead of just picking up a $30 bottle of porefessional, I decided to go with a holiday kit that included a handful of travel-sized goods, that I promise you, will never leave my bag.
I am always searching for the next best product to help rejuvenate my skin and infuse a mini miracle muse on my face. To be honest, I do a fair amount of research before purchasing a product to avoid any guilt or buyers disappointment. I had been eyeing Benefit collections for quiet some time now and originally went in for Porefessional, which youtube showed definitely did its job. And, it does. Youtube scores once again for credibility.
I purchased these products over a month ago, but prolonged the review to make sure I still loved the products just as much as the day I bought them. As you know, these reviews are obviously outcome determinative.
Instead of just picking up a $30 bottle of porefessional, I decided to go with a holiday kit that included a handful of travel-sized goods, that I promise you, will never leave my bag.
1. Porefessional- If you haven't heard about this product already, this really does make a difference. It will not make your pores completely disappear but promotes enough flawless to make your skin look twice as better. The primer is silky, think and spreads fairly easy. A little goes a long way. This product is definitely in my top 10 cant live with-outs.
2. Its Potent under eye cream- I brought with me on my ski trip, and it really helped to hydrate under my eyes in the -22 degree tundra. I wouldn't say its a miracle worker, but its soothing, hydrating and it does its job. My eyes look less puffy in the morning after using it.
3. Hoola golden bronzer- Let's face it, im a far cry away from bronzer-friendly. Im very, very fair and Im not sure that Ive ever even attempted to use bronzer. However, i did test this on my golden beauty of a friend, and it really helped her skin to glow. It was not extraordinary but it looked really natural and went on with ease.
4. That Gal face illuminator- WATCH OUT! This really does illuminate your face, no lie. I wouldnt recommend to use this primer all over your face but its really awesome on your cheeks and helps you to maintain a natural looking glow. I also noticed this prime helps flaws and fine lines disappear.
5. Belle Bamba blush- Have you ever heard of a scratch and sniff blush? Well, here's your chance. Bella Bamba Blush smells peachy and goes on as a beautiful coral color. Its great for cheek bone areas. If you have large pores on your cheeks closer to your nose, Id say to use this product with ease because it does have a bit of metallic and shine to it that can have a habit of brining out pores and wrinkles. Overall, its a great fresh-up product. Great for purse pick outs.
6. Bad Gal Lash- The wand is huge which I love, the mascara goes on very light yet dark. This is great for natural eyes with bold lashes. It was smudge-free and layer perfect. Throw on a few coats and call it a day.
7. Cha Cha Tint Cheek and Lip Stain- LIke Bamba, this is a beautiful coral color. Im usually not a fan of cheek stains because they tend to go on too bright on my skin no matter how much blending I do. This product did go on lighter but i prefer it on my lips. It was thin, creamy and is such a pretty natural color.
8. OHH la la lift- Ok, take note, another fantastic product by benefit. La La lift is the perfect primer/concealer for under eye circles. It instantly enhances your eyes and denounces dark colors underneath them. Its really thin, non cakey and one coat will cover your problematic area.
9. Sun Beam- Hi, Im pale..again. I tend to steer away from bronzer-highlighters. HOWEVER, this product blends really easily and give you a very nice, natural glow. Blend on your temples and tops of cheeks, it wont peel away your foundation and it lays on really nicely.
10. Stay dont Stray primer- this MIGHT be a cant live without. The primer goes on without hassel, is creamy, thin and makes my skin just feel nicer. I wore this out on NYE and my makeup was still perfectly layered on my face the following morning.
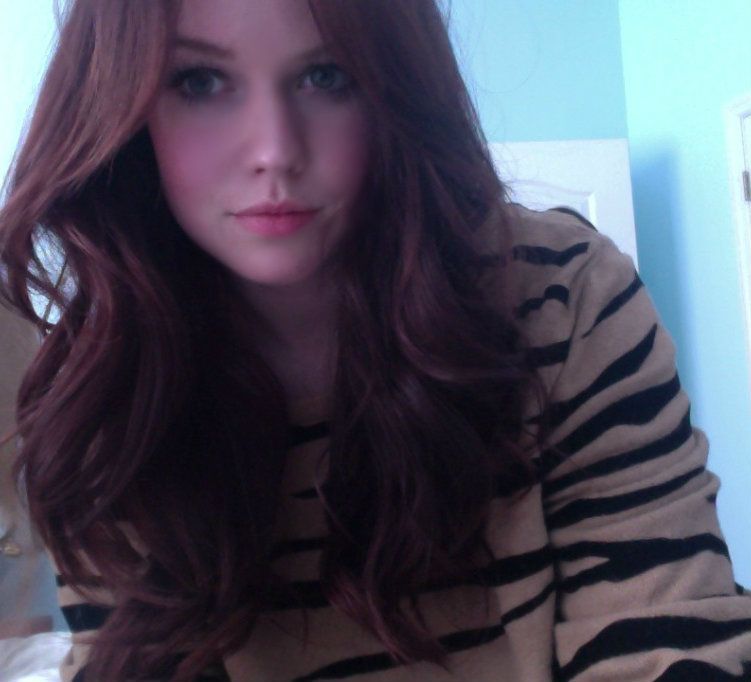
me wearing Cha Cha lip stain, belle bamba blush, ohh la la lift, and bad gal lash (one coat), with porefessional underneath. (Terrible attempt at self portrait, no touch ups.)
Wednesday, January 16, 2013
Stylin' Specs
Welp, Lauren has become a four-eyed, domesticated mother.
After a few impaired vision exams, it was best decided that she seek aid in finding a facial friend that would guide her to the light.
Finding suitable everyday lenses isn't always the easiest thing to do, especially when we are novice lens shoppers at best. But what we did know, was thrift and deals.
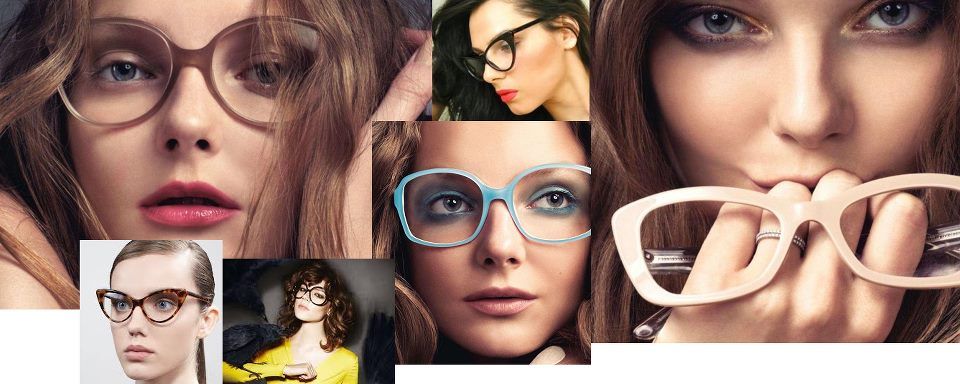
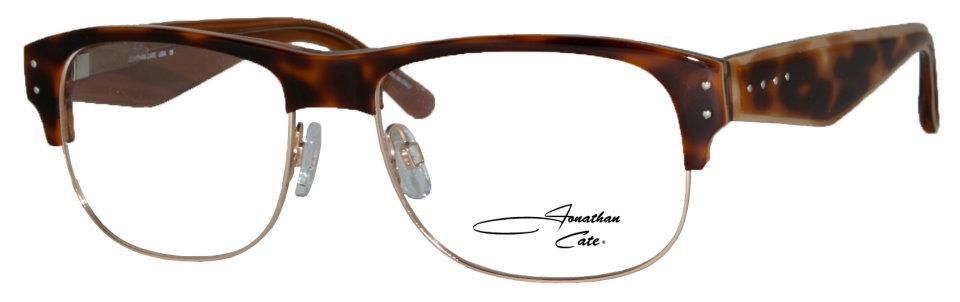
Upon our research to find some iris gems, we put together our inspiration picture (shown above). With no regard to budget or face shape, we diversified our love for lenses. Now, most of what is pictured above are Tom Fords, which range anywhere from 200-500+ dollar bills. Clearly, out of the price range. So, Lauren came across a pair of Jonathan Cate for half the price (Success!), pictured below. With a sassy and sophisticated mixture of brown and black, we figured these lenses would be perfectly interchangeable with each new outfit.
Jonathan Crate Eyeglasses
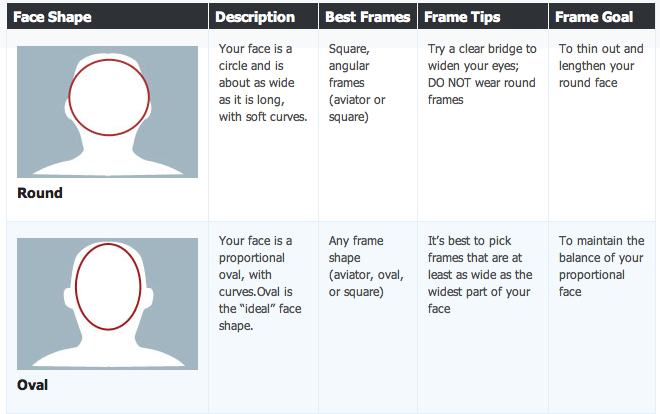
Lauren has a rounder/oval shaped face*
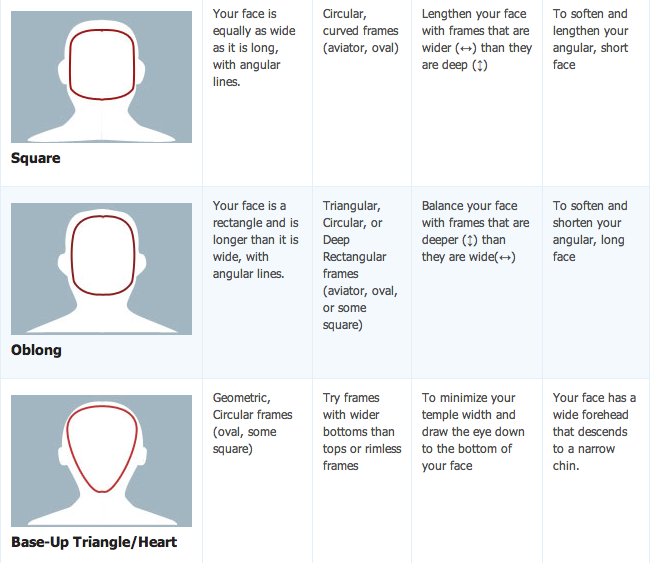
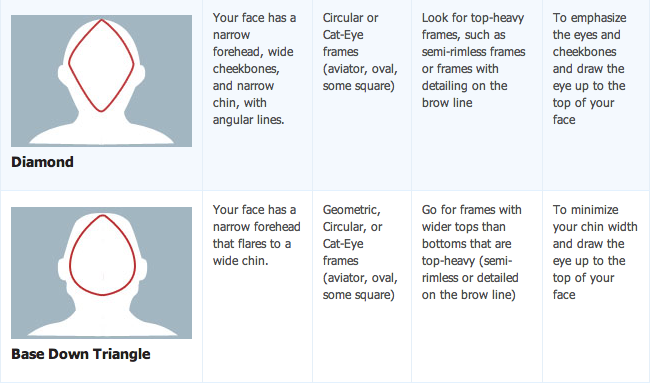
Of course we structured in face shape and design but I decided not to bore you with the details and instead provided you with a picture chart, because well, those are way more fun.
Whichever pair you choose, develop and refine your own style of specs. Plus, one corollary to a new pair of eye ware...is an instant makeover!
Monday, October 22, 2012
Long Stay Lip Love
Lately, Ive been loading on the color on my lips. Maybe its growing older into adult hood, or maybe its just a phase. Im not exactly sure of the unitary standard, but I do know that I absolutely LOVE it.
However, upon entering my new era of pout palettes, I noticed how dry and vulnerable it made my lips. Why in the world would I want to bring attention to my lips when they are crackled and morbid? After doing a few lips masques (which I shall share later), I came to the conclusion that I needed an affordable, every day stain that would alleviate me from reapplying and irritating my lips.
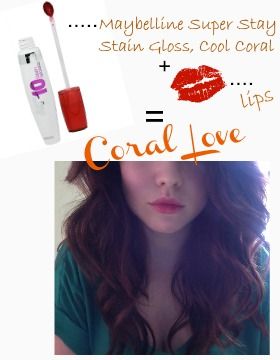
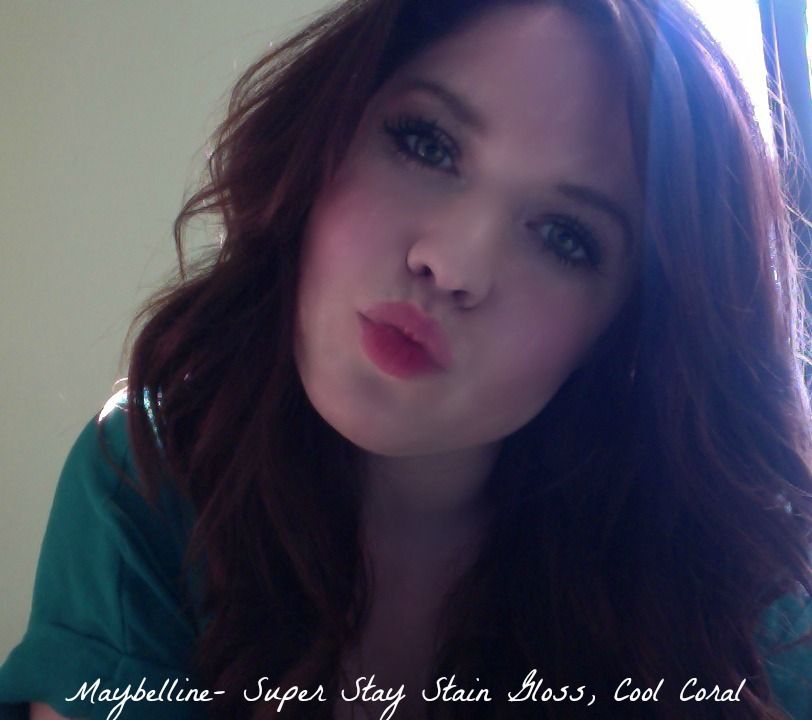
I decided to pick up Maybelline's Super Stay Stain Gloss in Cool Coral. I went coral for a few reasons; One, being that I have pink under tones in my skin and coral reduces the emphases of my Irish attributes (as opposed to a true pink); Two, its great for every day wear, andddd Ive just been loving the color all summer.
At first glance, I didnt and still do not understand the design to the lip wand that Maybelline uses for the stain. But, it didnt make a difference to the application of color. The color was calmer than I thought it would be. Its always hard to predict what itll look like inside of the bottle. Upon application, I noticed that it smelled like bubble gum and berries (who wouldnt like that smell) and dried evenly even though i added more color to my bottom lip than top (always a bonus). So far, ive had two cups of coffee (ready to destroy some contracts), breakfast, a snack..and my lips haven't dampened. ANNDDD they are still hydrated. YESS! For under ten bucks, Id definitely say this product does what its supposed to do. Another recommendation from me to you :). Ill be trying out bold red next!
However, upon entering my new era of pout palettes, I noticed how dry and vulnerable it made my lips. Why in the world would I want to bring attention to my lips when they are crackled and morbid? After doing a few lips masques (which I shall share later), I came to the conclusion that I needed an affordable, every day stain that would alleviate me from reapplying and irritating my lips.
I decided to pick up Maybelline's Super Stay Stain Gloss in Cool Coral. I went coral for a few reasons; One, being that I have pink under tones in my skin and coral reduces the emphases of my Irish attributes (as opposed to a true pink); Two, its great for every day wear, andddd Ive just been loving the color all summer.
At first glance, I didnt and still do not understand the design to the lip wand that Maybelline uses for the stain. But, it didnt make a difference to the application of color. The color was calmer than I thought it would be. Its always hard to predict what itll look like inside of the bottle. Upon application, I noticed that it smelled like bubble gum and berries (who wouldnt like that smell) and dried evenly even though i added more color to my bottom lip than top (always a bonus). So far, ive had two cups of coffee (ready to destroy some contracts), breakfast, a snack..and my lips haven't dampened. ANNDDD they are still hydrated. YESS! For under ten bucks, Id definitely say this product does what its supposed to do. Another recommendation from me to you :). Ill be trying out bold red next!
Wednesday, August 1, 2012
Emulate Emma- Bold Blue Babies
For those of you with tired eyes, the easiest way to wake them up is to line your eyes in blue. Yes, blue. Blue liner makes the inner white in your eye seem brighter. Therefore, creating the illusion of WIDE AWAKE LOOKERS.
When we think blue, we think Emma. Emma stone is always known for her gold and blue eyes. Thus, we decided to pull a form of copy cat...and emulate our favorite, Emma.
Here's our adapted eye...
I Used the following MAC eyeshadows below:
1. Jest- Neutral Base of the eye
2. Parrot- prime liner
3. Deep Truth- Main Liner
I first primed my eyes in JEST to give myself a good natural base to play with. I only went as high as the crease in my eye.
Next, I lined my eyes with parrot and followed underneath my eye as well. Dont worry about making this perfect.
Take a thin liner Brush, dip it in water and pat into Deep Truth. I wet the brush so the powder from the shadow would not fall into my eye or on my check. It also gives the look a smoother liner. Dont be afraid to use liner as opposed to shadow. I am just better with lines when using Shadow.
Line your eye with Deep Truth as close to the base as you can. When creating a cat eye, I sometimes like to use a straight edge of a piece of paper to measure and make sure my line is straight. Follow the liner below your eye as well, connecting the cat eye to the bottom of your eye.
Put on your favorite Mascara (I used Define A Lash) and a touch of white in the inner corner of your eye, and you're ready to party!
Monday, July 30, 2012
Transition Tantrum
The summer months are slowly crawling closer to fall and its time to start selecting your summer transitional pieces! Our favorite, and most obvious, color for this times O' turning would definitely have to be red--and variations of the sort. Red revives the youth of summer, it can be worn in outfit neutrals or on your smackers. Its the versatile color of transition...
Auburn/Brunette/blond- Pink Undertones.
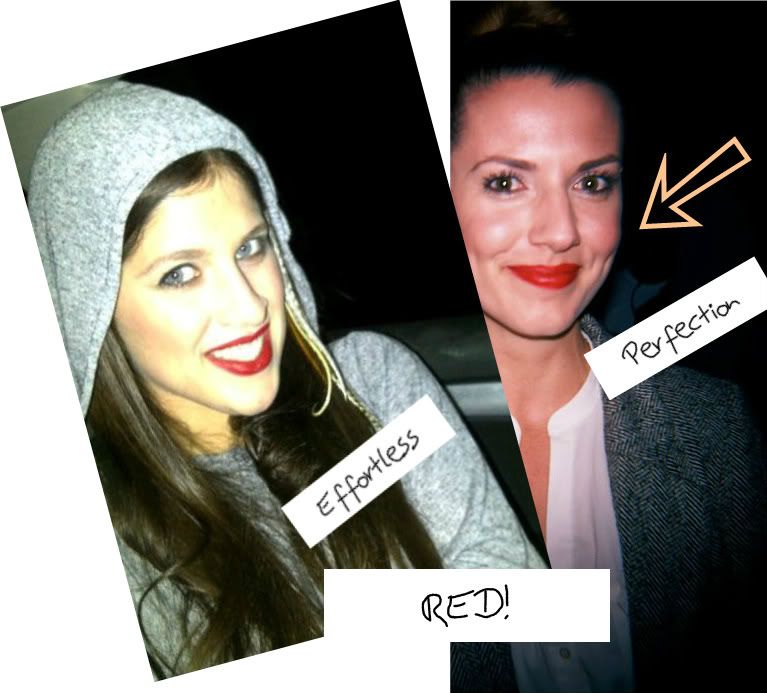
Embracing your hair color and skin tone is a MUST when using reds on your lips to make your palette pop. Remember our number 1 rule, if you play up lips, play down eyes!
I use Deep reds and pinks with blue undertones (blue makes your teeth look whiter). Think Berry, Cherries, and true reds. Steer clear of orange-red but feel free to embrace coral (a more pink-orange).
Auburn/Brunette/Blond/Reds- Olive Undertone
Go crazy! You're a talent of reds! You can use burgundy shades, to tangerine red! Rock deep reds with purple hues--A La wine colored.
Tuesday, June 26, 2012
Lickin' Lips
We've seen it on the luscious lips of Lana Del Rey..and lets be honest, who can NOT stop and stare at her beauty?
So, it became of instinctive aptitude to adopt a part of her maven mystery...
LIP LINER.
See, the problem began when noticing that I naturally have very pale and nude lips. Yes, thats great when youre Penelope Cruz and have iconic olive undertones. However, for someone who is as fair skinned as her lips, it can some times become problematic.
Using any sort of color on my lips can, at times, can be too much depending on my wardrobe and scenario. I started using lip liner as color because it kept my lips looking plump--by being able to sculpt the outter lips (a la Lana) but at the same time allowed the matte coloring to keep them looking basic and natural. These sticks are cheaper than lipstick and alleviates me from being washed out in pictures.
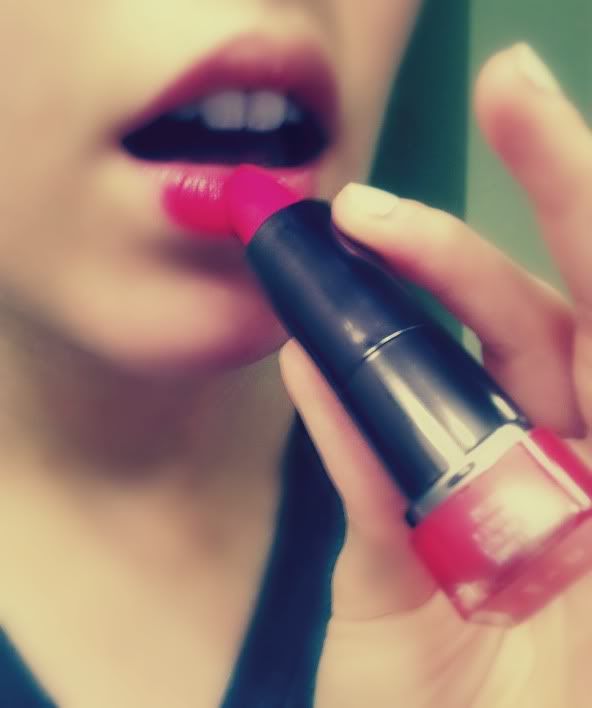
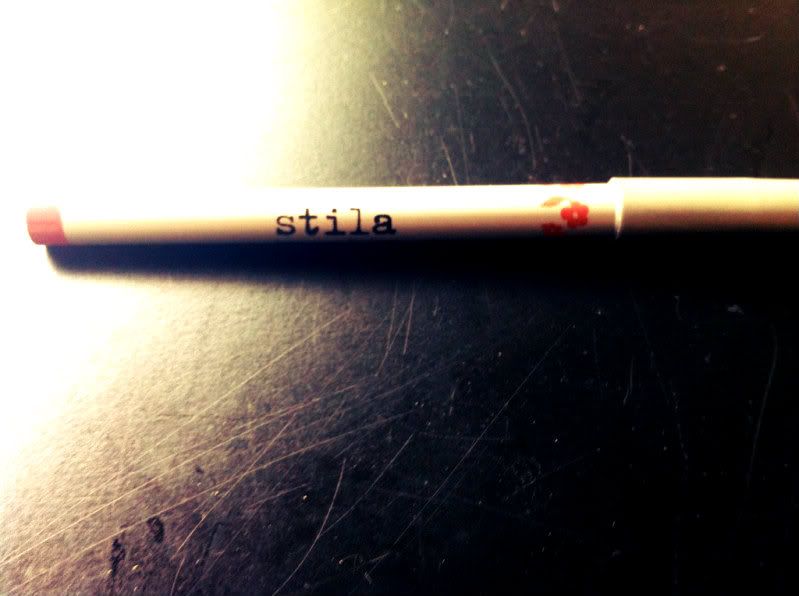
In this picture I used Stilla Aspiring and applied it as liner as well as color all over my lips. I also used it in the shoot with AsheliPhotography which you can find here.
Give it a try!
So, it became of instinctive aptitude to adopt a part of her maven mystery...
LIP LINER.
See, the problem began when noticing that I naturally have very pale and nude lips. Yes, thats great when youre Penelope Cruz and have iconic olive undertones. However, for someone who is as fair skinned as her lips, it can some times become problematic.
Using any sort of color on my lips can, at times, can be too much depending on my wardrobe and scenario. I started using lip liner as color because it kept my lips looking plump--by being able to sculpt the outter lips (a la Lana) but at the same time allowed the matte coloring to keep them looking basic and natural. These sticks are cheaper than lipstick and alleviates me from being washed out in pictures.
In this picture I used Stilla Aspiring and applied it as liner as well as color all over my lips. I also used it in the shoot with AsheliPhotography which you can find here.
Give it a try!
Sunday, June 10, 2012
Monday, January 30, 2012
Youthful lookin' YOU
..long were the days that our faces would factotum a fadaise of foul play. With spring coming up, its all about the fresh faced fun. But, lets be honest...we arent all blessed with flawless skin. Here are some of the tricks we use to ignite a glowing conflagration.
We opted to shy away from photoshop just for you..
Oil of Olay: Before I begin anything i ALWAYS ALWAYS apply a non comedogenic lotion all over my face. My mom has always used oil of olay, so I suppose it was genetically gifted to me as well. I use Oil of Olay Complete All Day UV moisturizer for normal skin with SPF 15. Ill let this sit for about 5 minutes or until its nearly dewey, while the skin absorbs the lotion's vitamins.
MAC Prep + Prime Fortifying Skin Enhancer: Yes, Im fortunate enough to have a beautiful sister as a makeup artist for MAC and she always points me in the right direction. Until using this miracle worker, I found that my makeup started caking around my checks and nose area throughout the day. MAC has completely eradicated that issue. This primer goes on just like lotion and literally makes my skin look flawless for days-if I decided to leave it on for that long. Ill let this sit for just a few minutes before applying my makeup.
Bare Minerals: Depending on the day- if im running errands or attending a party (which is rare), ill either just use mineral veil or their loose powder/foundation. I obviously use the color "fair." For those of you with sensitive skin or irreconcilable breakouts, I would really recommend switching over to mineral makeup. Its much lighter on skin and can decrease your number of breakouts.

MAC Pigment-Bright Fuchsia Frost: Now here is my secret. Instead of using a matte blush, I opt for loose pigments or shimmery colors on my checks-wether those be shadows or blushes. MAC's bright fuchsia is something I think I could not live without. It definitely gives me that glowing pop I need to have on my fair face. Find this survival gem by clicking here.
After I complete my founded new look, if I see that my makeup doesnt look a la natural I do one of two things; 1. I will take a blowdryer on low heat and blow out my face for a few seconds. This allows my face to absorb the makeup as opposed to having the makeup just sit on my face. If im feeling energetic, Ill do a few jumping jacks, squats, or sit-ups to get the blood pumping.
Eyes: My shadow colors vary day to day but for the sake of being consistent, ill tell you what was used in this picture. I normally like to mix matte colors with shimmer. However, for a glowing face, I prefer shimmer on eyes. In this picture I used TooFaced fashion on the base of my lid. On the inner corner of my eye, I used Nude Beach and followed under my eyes with that color as well. On the outer corner of my eye I used Honey Pot--all colors by TooFaced, which came in an amazing palette (Natural Eyes Collection) given to me by a wonderful TooFaced rep. This has become my new obsession and I recommend any girl to buy this. These browns are perfect for ANY face. I topped off my look with TooFaced Size Queen mascara. To make this look more drastic (a la day to night) try adding Urban Decay black pencil liner into the mix. MAC engraved and smolder are also a few of my favs.
We opted to shy away from photoshop just for you..
Oil of Olay: Before I begin anything i ALWAYS ALWAYS apply a non comedogenic lotion all over my face. My mom has always used oil of olay, so I suppose it was genetically gifted to me as well. I use Oil of Olay Complete All Day UV moisturizer for normal skin with SPF 15. Ill let this sit for about 5 minutes or until its nearly dewey, while the skin absorbs the lotion's vitamins.
MAC Prep + Prime Fortifying Skin Enhancer: Yes, Im fortunate enough to have a beautiful sister as a makeup artist for MAC and she always points me in the right direction. Until using this miracle worker, I found that my makeup started caking around my checks and nose area throughout the day. MAC has completely eradicated that issue. This primer goes on just like lotion and literally makes my skin look flawless for days-if I decided to leave it on for that long. Ill let this sit for just a few minutes before applying my makeup.
Bare Minerals: Depending on the day- if im running errands or attending a party (which is rare), ill either just use mineral veil or their loose powder/foundation. I obviously use the color "fair." For those of you with sensitive skin or irreconcilable breakouts, I would really recommend switching over to mineral makeup. Its much lighter on skin and can decrease your number of breakouts.
MAC Pigment-Bright Fuchsia Frost: Now here is my secret. Instead of using a matte blush, I opt for loose pigments or shimmery colors on my checks-wether those be shadows or blushes. MAC's bright fuchsia is something I think I could not live without. It definitely gives me that glowing pop I need to have on my fair face. Find this survival gem by clicking here.
After I complete my founded new look, if I see that my makeup doesnt look a la natural I do one of two things; 1. I will take a blowdryer on low heat and blow out my face for a few seconds. This allows my face to absorb the makeup as opposed to having the makeup just sit on my face. If im feeling energetic, Ill do a few jumping jacks, squats, or sit-ups to get the blood pumping.
Eyes: My shadow colors vary day to day but for the sake of being consistent, ill tell you what was used in this picture. I normally like to mix matte colors with shimmer. However, for a glowing face, I prefer shimmer on eyes. In this picture I used TooFaced fashion on the base of my lid. On the inner corner of my eye, I used Nude Beach and followed under my eyes with that color as well. On the outer corner of my eye I used Honey Pot--all colors by TooFaced, which came in an amazing palette (Natural Eyes Collection) given to me by a wonderful TooFaced rep. This has become my new obsession and I recommend any girl to buy this. These browns are perfect for ANY face. I topped off my look with TooFaced Size Queen mascara. To make this look more drastic (a la day to night) try adding Urban Decay black pencil liner into the mix. MAC engraved and smolder are also a few of my favs.
Friday, January 27, 2012
Oh, The Marvels of Mascara...
Two Items that we both have agreed we could not live without are chapstick and MASCARA.
Mascara can easily make or break a fresh faced look. However, why is it that the perfect mascara for our eyes has yet to be found?
Check out our favorite lash go to reviews:
1.
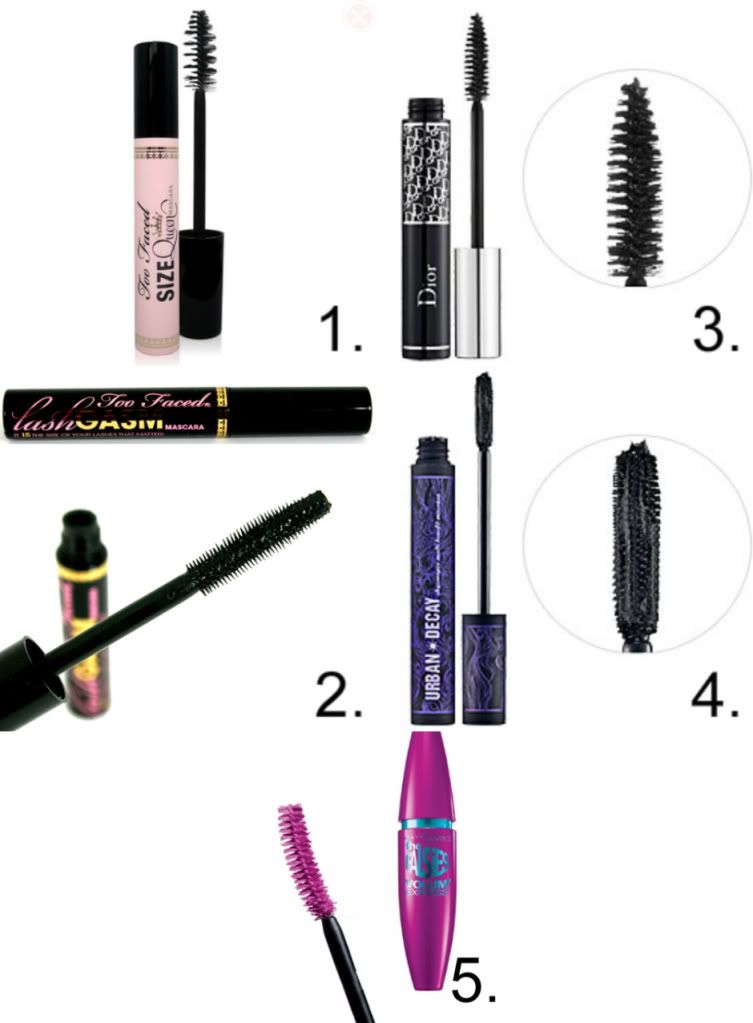
Too Faced Size Queen (Sephora, $21)
Tee: I love this mascara mainly because it makes my lashes look natural. It never hardens no matter how many layers I put on, its dark and thick but appears light and and airy. Size queen provides a full look as well as elongated my lashes at the same time, which I find to be a combo rarity. Things to look out for: The wand on this bad boy is HUGE. Im talking HUGE. It will take some time to learn how to apply this mascara on your lashes. This may not be the best fit for those of you will short or thin lashes. However, for those of you with lashes that resemble mine, it is impossible to catch the spider syndrome with this mascara. I love using Size Queen with just a loose powder on my face. I let the lashes do all the talkin'.
Too Faced LashGasm (Sephora, $21)
Tee: LashGasm is my go to when im experiencing stubborn lashes. The wand is tiny and detailed. This is PERFECT for exposing every bottom lash. The mascara is gentle and super black! Things to look out for: May slightly harden lashes.
3.
Christian Dior DiorShow (Sephora, $24.50)
Ash: This mascara is my all time favorite. It never makes my lashes hard, but curls and adds length and volume to my rather spares lashes. It's super hard to get my lashes to curl, but this mascara effortlessly makes my lashes look amazing! Downside: Expensive, but worth it!
4. Urban Decay Skyscraper (Sephora, $20)
Ash: This mascara has a great brush for definition. I use it in combination with Falsies to prevent my eyes from getting that spidery look. It works great for bottom lashes, and defines top lashes. Downside: Hardens lashes.
5. Maybelline Falsies (Drugstores, $6)
We can't always afford to indulge ourselves with a $20 or $30 tube of mascara, so this is what we use in combination with our favorites, or just to get us through a tight squeeze.
*It should be noted that that in case of emergencies (when we know we are being photographed or going out) we opt for luscious lashes. Yes, this may require a bit of spider syndrome- long, hardened lashes. For this look, I often refer to Maybeline's Define A Lash and double extension lash by L'Oreal. We first prime our eyes with double extension, then use the mascara side of the tube. Ill top it off with define a lash to get those last little centimeters I need to pull off a showcased look.
Reasons we dont use Define A Lash alone: The first few weeks of this baby are brutal! The mascara is thick, watery, and literally paints on ALL over our eyes! Yes, terrible. However, if you can withstand those first few weeks define a lash turns out all right. It may not provide you with the fullest set of eye strands, but it definitely elongates each strand-in time.
Mascara can easily make or break a fresh faced look. However, why is it that the perfect mascara for our eyes has yet to be found?
Check out our favorite lash go to reviews:
Too Faced Size Queen (Sephora, $21)
Tee: I love this mascara mainly because it makes my lashes look natural. It never hardens no matter how many layers I put on, its dark and thick but appears light and and airy. Size queen provides a full look as well as elongated my lashes at the same time, which I find to be a combo rarity. Things to look out for: The wand on this bad boy is HUGE. Im talking HUGE. It will take some time to learn how to apply this mascara on your lashes. This may not be the best fit for those of you will short or thin lashes. However, for those of you with lashes that resemble mine, it is impossible to catch the spider syndrome with this mascara. I love using Size Queen with just a loose powder on my face. I let the lashes do all the talkin'.
Size Queen used in picture.
2. Too Faced LashGasm (Sephora, $21)
Tee: LashGasm is my go to when im experiencing stubborn lashes. The wand is tiny and detailed. This is PERFECT for exposing every bottom lash. The mascara is gentle and super black! Things to look out for: May slightly harden lashes.
3.
Christian Dior DiorShow (Sephora, $24.50)
Ash: This mascara is my all time favorite. It never makes my lashes hard, but curls and adds length and volume to my rather spares lashes. It's super hard to get my lashes to curl, but this mascara effortlessly makes my lashes look amazing! Downside: Expensive, but worth it!
4. Urban Decay Skyscraper (Sephora, $20)
Ash: This mascara has a great brush for definition. I use it in combination with Falsies to prevent my eyes from getting that spidery look. It works great for bottom lashes, and defines top lashes. Downside: Hardens lashes.
5. Maybelline Falsies (Drugstores, $6)
We can't always afford to indulge ourselves with a $20 or $30 tube of mascara, so this is what we use in combination with our favorites, or just to get us through a tight squeeze.
*It should be noted that that in case of emergencies (when we know we are being photographed or going out) we opt for luscious lashes. Yes, this may require a bit of spider syndrome- long, hardened lashes. For this look, I often refer to Maybeline's Define A Lash and double extension lash by L'Oreal. We first prime our eyes with double extension, then use the mascara side of the tube. Ill top it off with define a lash to get those last little centimeters I need to pull off a showcased look.
Reasons we dont use Define A Lash alone: The first few weeks of this baby are brutal! The mascara is thick, watery, and literally paints on ALL over our eyes! Yes, terrible. However, if you can withstand those first few weeks define a lash turns out all right. It may not provide you with the fullest set of eye strands, but it definitely elongates each strand-in time.
wearing Define-A-Lash and Double Extension
Thursday, December 1, 2011
Things we like: Red-Ponies
Gimme some Red Ponies!
Dassss right, Hippie darlings! Bold lips and simple hair are our go-to this holiday season-mainly because it well suits the vice of lazy days.
Throw your hair back in a pony, strap on a blazer and let your lips do the talking.
Here's some aggrandized red looks that we think are rad.
Color from yo motha: Reds for Skin Tones
Honestly, going red is trial and error. Most 'experts' deem oranges a perpetrator of hate on fair skin tones and maroons glorious on olives. Trouble shoot your own color palette and you'll learn what looks best on you. Here's what we used.
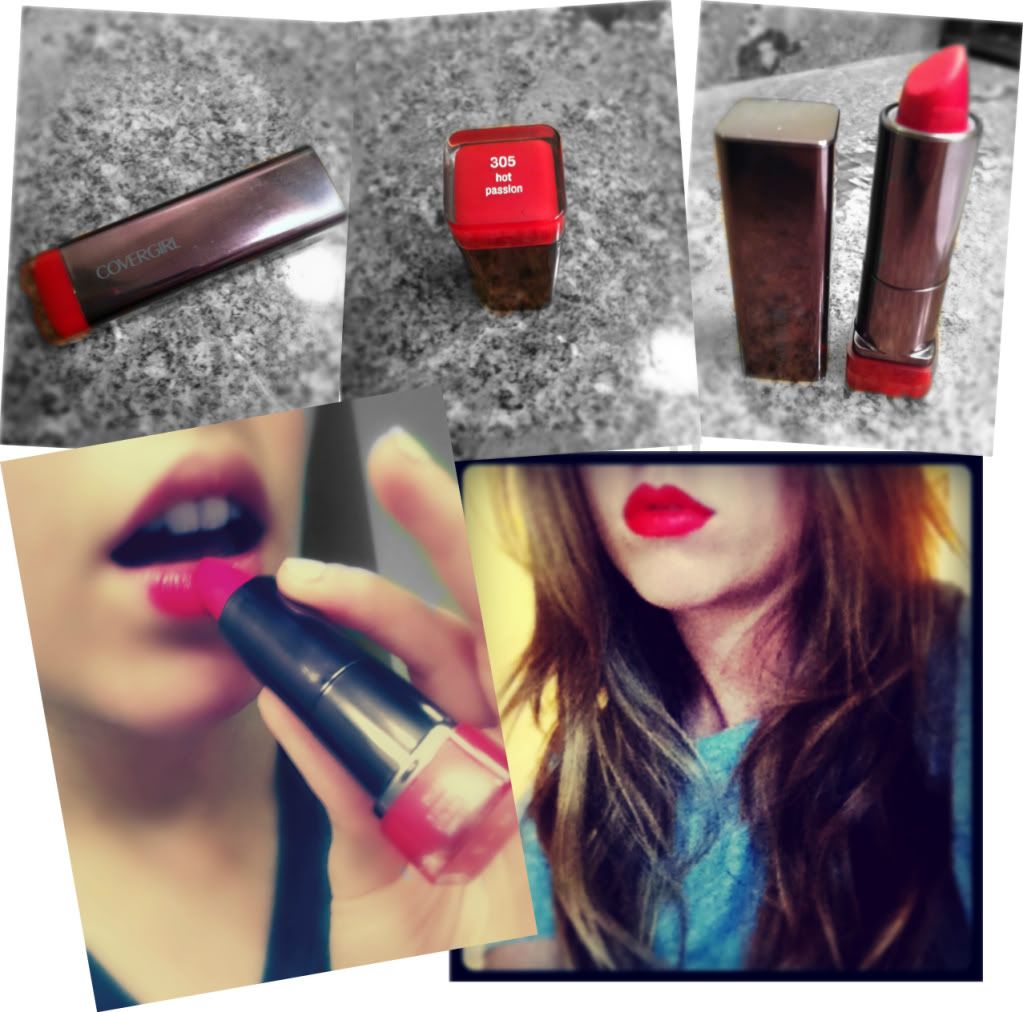
Having completely different skin tones, we both found (unknowingly) that CoverGirl's 305- Hot Passion worked well on both of us. I found it tempting mainly because it was fairly easy to smooth on my lips, while Asher went straight for the dominance of his bold hues. Hot Passion is a well diversified loyal man..
Scared to go Red? Don't be. You may think you look like a crazed clown at first- but lets face it, its impossible to hate a classic look. If you are fair skinned (with plump lips, like myself) opt for red lips with a clear gloss on top to water down the color.
Stila makes great Reds that work for beginners. Try a stain- its more than a gloss but less than a lipstick.
We like Stila Cherry Crush.
Other Notable Reds we LOVE:
Mac- Russian Red
Loreal Infallible- Le Rouge
Cover Girl- Tempt
Lipstick often gives you that dry feeling that makes you timid towards conversation or confidence. Try moisturizing your lips before you know you are going to smack on some color. Vitamin E And Honey can go a long way. Just smudge some on your lips. Add a tea spoon of sugar for a great DIY exfoliation.

Lip stick smearing? Try taking some aerosol hairspray and giving it a quick spray on your lips. This works wonders on glitter lips.
REMEMBER: Red is Ravishing so let it speak for you. Go simple with hair and makeup. A little red is all you need.
Dassss right, Hippie darlings! Bold lips and simple hair are our go-to this holiday season-mainly because it well suits the vice of lazy days.
Throw your hair back in a pony, strap on a blazer and let your lips do the talking.
Here's some aggrandized red looks that we think are rad.
Color from yo motha: Reds for Skin Tones
Honestly, going red is trial and error. Most 'experts' deem oranges a perpetrator of hate on fair skin tones and maroons glorious on olives. Trouble shoot your own color palette and you'll learn what looks best on you. Here's what we used.
Having completely different skin tones, we both found (unknowingly) that CoverGirl's 305- Hot Passion worked well on both of us. I found it tempting mainly because it was fairly easy to smooth on my lips, while Asher went straight for the dominance of his bold hues. Hot Passion is a well diversified loyal man..
305-Hot Passion by CoverGirl (This would be cuter if my hair was up)
Scared to go Red? Don't be. You may think you look like a crazed clown at first- but lets face it, its impossible to hate a classic look. If you are fair skinned (with plump lips, like myself) opt for red lips with a clear gloss on top to water down the color.
Stila makes great Reds that work for beginners. Try a stain- its more than a gloss but less than a lipstick.
We like Stila Cherry Crush.
Other Notable Reds we LOVE:
Mac- Russian Red
Loreal Infallible- Le Rouge
Cover Girl- Tempt
Lipstick often gives you that dry feeling that makes you timid towards conversation or confidence. Try moisturizing your lips before you know you are going to smack on some color. Vitamin E And Honey can go a long way. Just smudge some on your lips. Add a tea spoon of sugar for a great DIY exfoliation.
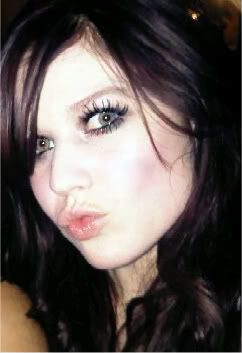
Lip stick smearing? Try taking some aerosol hairspray and giving it a quick spray on your lips. This works wonders on glitter lips.
REMEMBER: Red is Ravishing so let it speak for you. Go simple with hair and makeup. A little red is all you need.
Thursday, November 10, 2011
An Eye for an Eye
What was once a far fetched (and almost a meretricious ideology) has swept the peninsular tips of Florida once again! Fall has arrived!
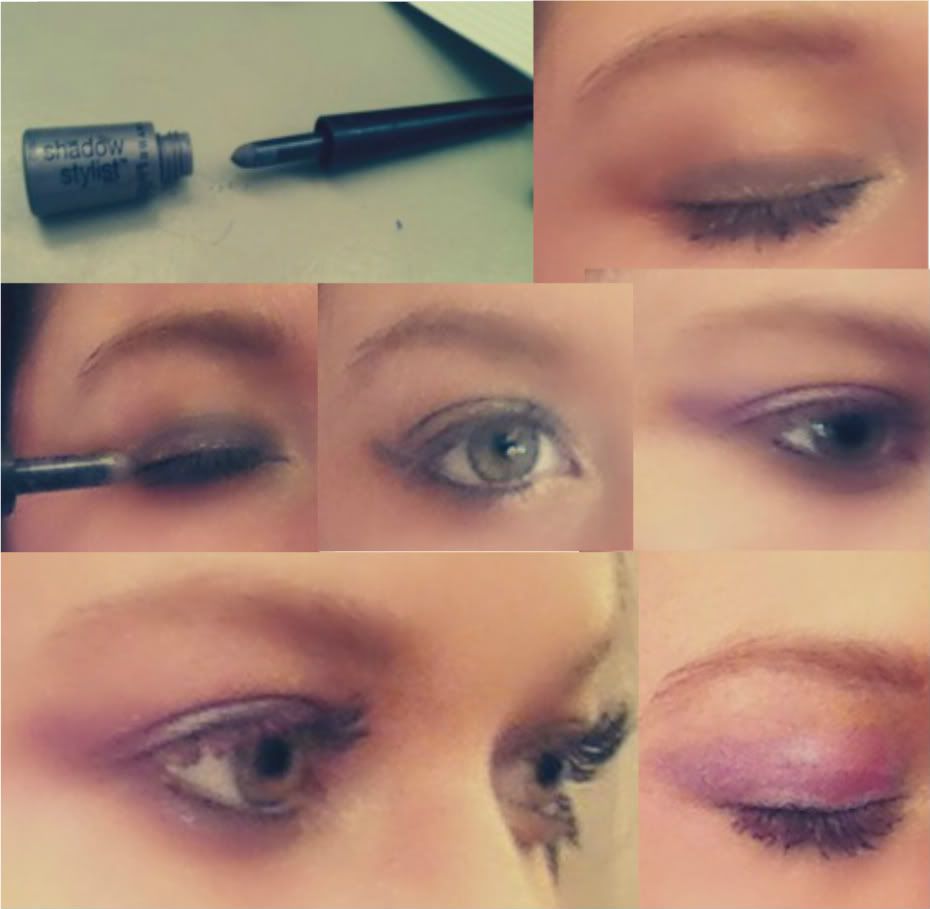
Bust out your golds,browns and blues! Its time for smokey eyes and cat liner!
Learn how to doll up your luscious lashes here!
Be a Cat
A survivor of the flood, this non-revolutionizing liner has been making appearances on Lauren Conrad and Dita Von Teese. Cat liner is known for curating any simple suit and is always pleasing, precious and pure. In a hurry? Draw on some simple liner and smack on some chap stick, this look perfects the imperfect.
For those of you who dismiss any sort talent towards eye liner, you can try out shadow in cat-form.
1. Start off my shadowing in the base of your eye as if you were doing eye liner.
2. Starting at the outer corner of your eye, draw a line going up until you hit the crease of your eye.
3. At the top of your newly drawn line, connect the line to your actual crease (as if you were drawing a half triangle) and shade in.
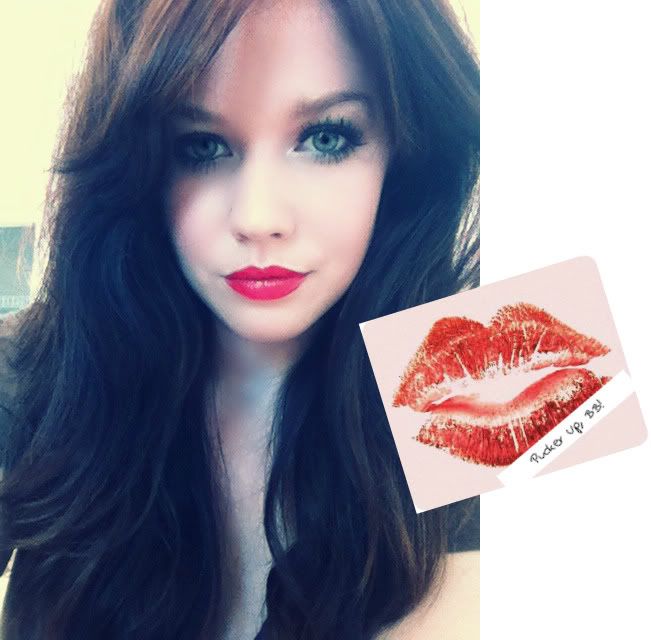
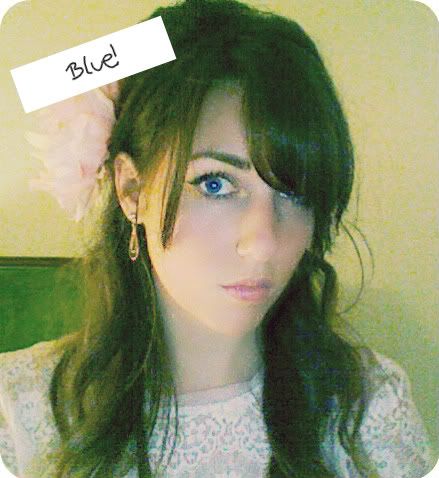
Gimme Yo' Baby Blues
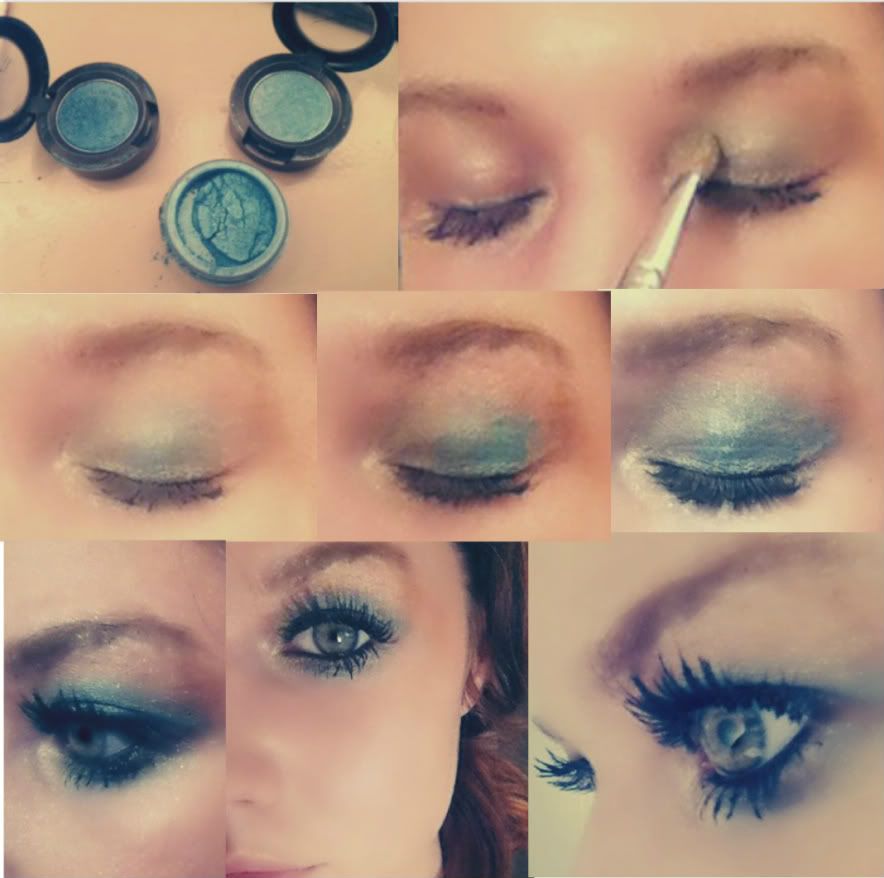
Using color on your eyes has been thought of as a daunting task for many. But, don't you fret my little hippies,using colors have become simple, romantic and riveting. Try out some blues, greens, and purples for fall and winter. The trick is mixing loose shadows with palette colors. Pick two correlating shades o' color-a darker and a lighter color of the same gene pool.

1. I first primed my eyes- this is vital considering you will be using loose powder.
2. I took my lightest shade of blue and shaded in the inner corner of my eye.
3. I took the second darkest blue and shaded in the middle of my eye.
4. I then took my loose powder (you could use a darker color or just two colors) and finished the outer corner of my eye.
4. Bring the color underneath your eye for a smokey blue effect!
A Wondrous Winter land in White
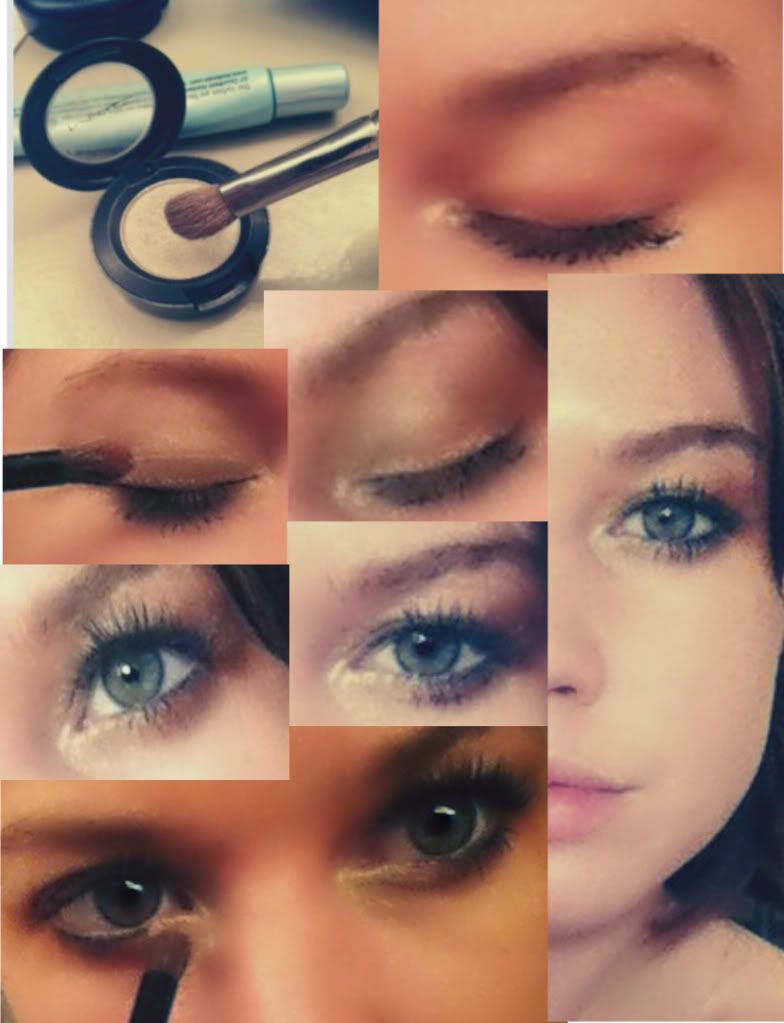
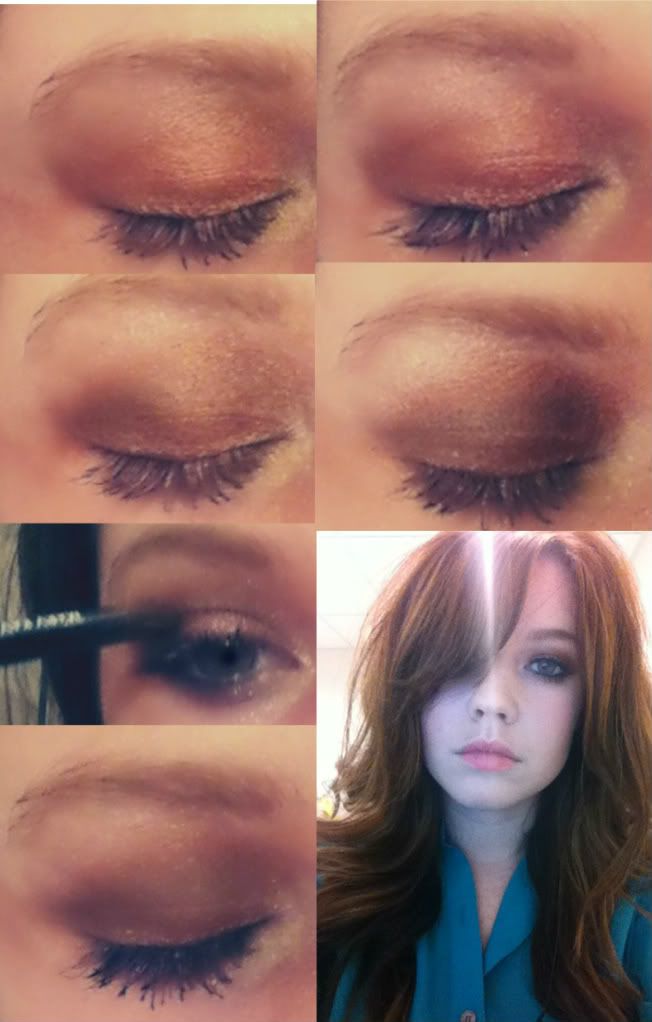
You've seen models strutting the runway looking snow-globe esque. Tired? Have circles under you eyes? Wipe them away with white! Using white can liven up skin and brighten up eyes. It's the easiest trick in the book.
1. Start by adding a simple nude colored base coat all over your eye lid.
2. Take white and shade in the inner corner of your eye.
3. Take a brown or gold (our fav) and shade in the middle of your lid to the outer corner.
4. Take the white and shade the inner bottom lid of your eye to make your eyes POP.
Gold Digger
Classic black smokey eyes will never be eradicated. Although, we do occasionally love a haughty dark eye, we find browns to much more flattering. Our secret weapon? GOLD! Golds, will bring out the sparkle in every eye color (trust me). Use a little dab of gold and let your eyes do the talkin'!
Get your brown smokey eye on!
1. Start by adding a gold base color on you bottom half of your lid.
2. Get a darker brown (metallic or matte) and shade in just the crease of your eye.
3. Add liner
4. Once you have liner your eyes, take a shadow brush and smudge in the liner to get a smokey look.
4. Follow with brown or gold underneath your eyes to create a smokey look.
Primary Palette
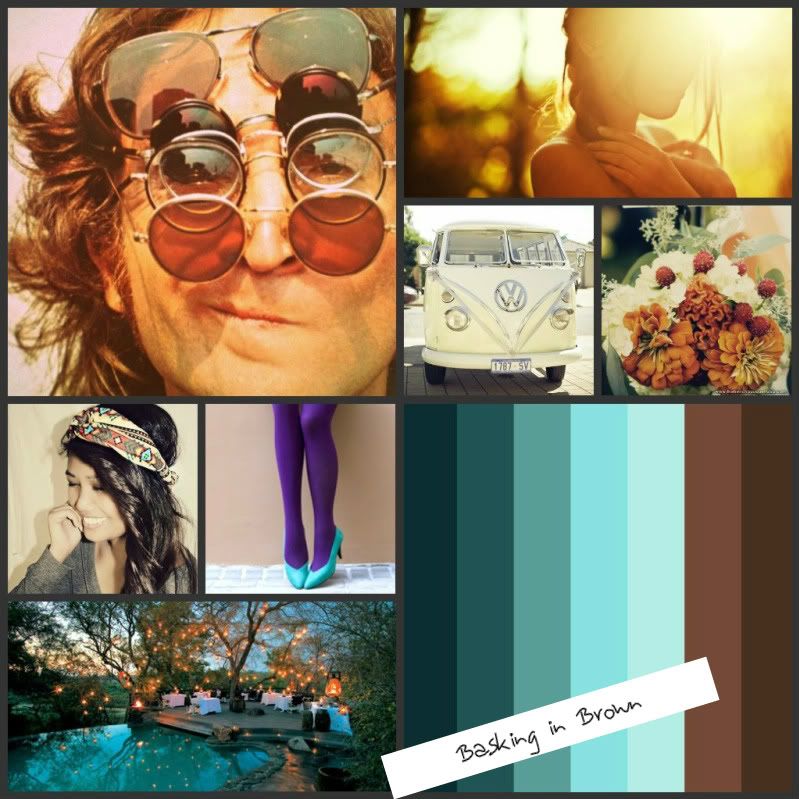
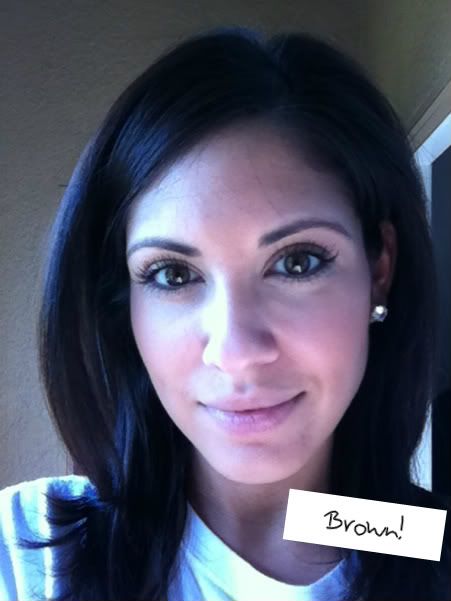
By the standards notation, each eye color is destined to specific colors. Thus, the anti aberrant avers that brown eyes get purple, blue eyes use browns, and green eyes marry pinks and peaches. While an ounce of me believes this to be true,we think it is based off of preference, style and sass ( I would never wear pink on my eyes).
Deviate from the norm, check our some of the color palette's we put together below.
Subscribe to:
Posts (Atom)