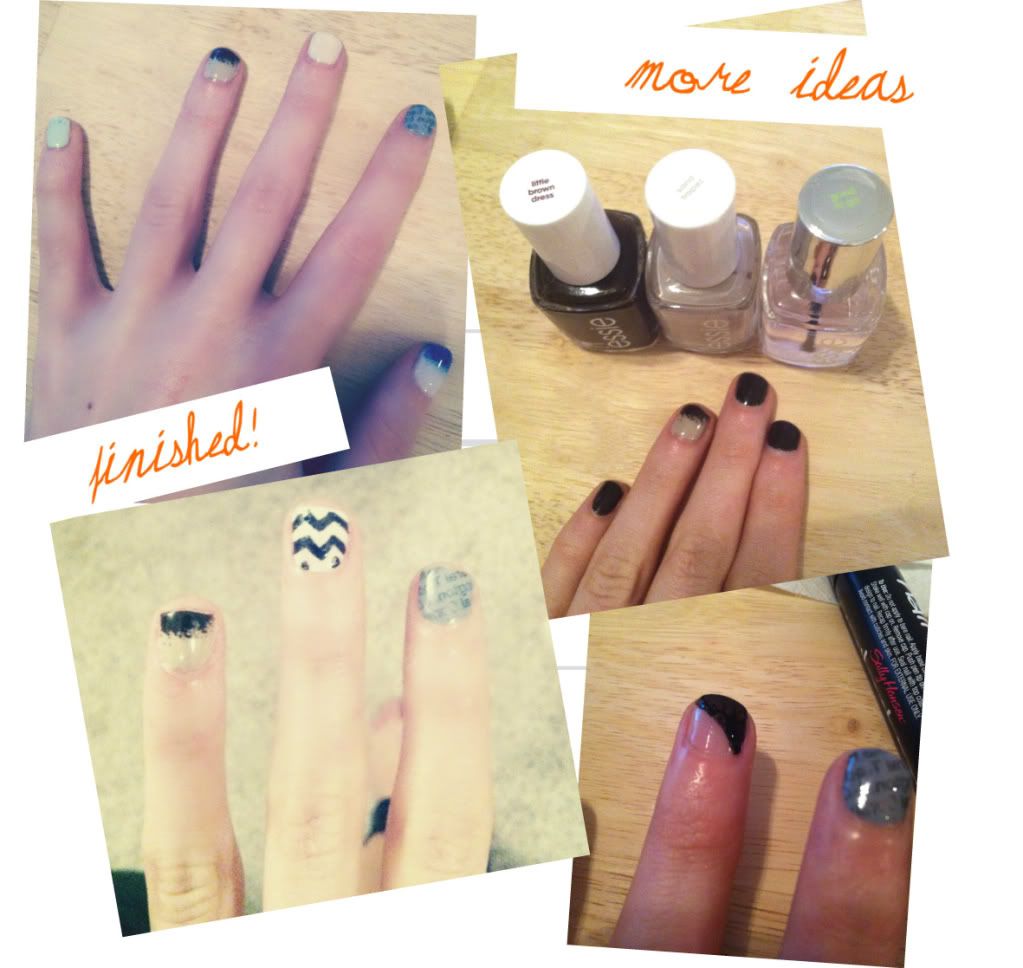
Two tones of color on your nails are twice as nice! Bored with the endless drone of manicures that are out there, we opted to try something different. As much as we love layering clothing, we thought - hey, why not try this with our darling digits?
Feel free to get creative with the color combos - I'm already anticipating my next amalgamation.
1. Start with a clean, polish free set of nails.
2. Paint two thin coats of black polish. (Or the darker color - not necessarily black!). I used a Sally Hansen color called Black Out, which I conveniently removed the label for, so I have no way of telling you which type it is.
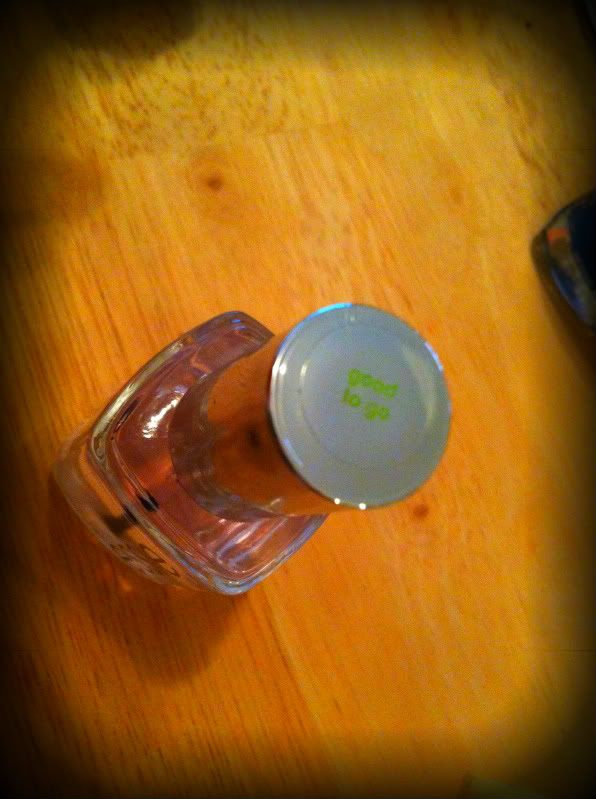
3. Let this coat dry COMPLETELY. Don't get antsy, or you will end up with mixed polish! I recommend painting this first color with Essie's Good To Go - It helps set the polish much more quickly.
4. Next, paint your top color, but leave an edge around this second color by painting a smaller space - this gives the illusion of a line around the color, without having to paint the line! I was sick of seeing dark colors on my nails from winter, so I opted for a vibrant Matte Green 1 from Urban Outfitters' polish line. Allow to dry.
5. Paint a top coat - I used my Essie a second time here. (I didn't want the color to be Matte, so I made sure I used a top coat.)
RIP french acrylics. The New age has brought forth a dire need to take pop art to the cuticles. We wont go as far as Andy Warhol would, but we'd have to agree that this task is audaciously fun and cheap.
Level the peace in your bank account and say adios to the nail salon. Here are some DIY nail recipes that'll be sure to bring the out the compliments.
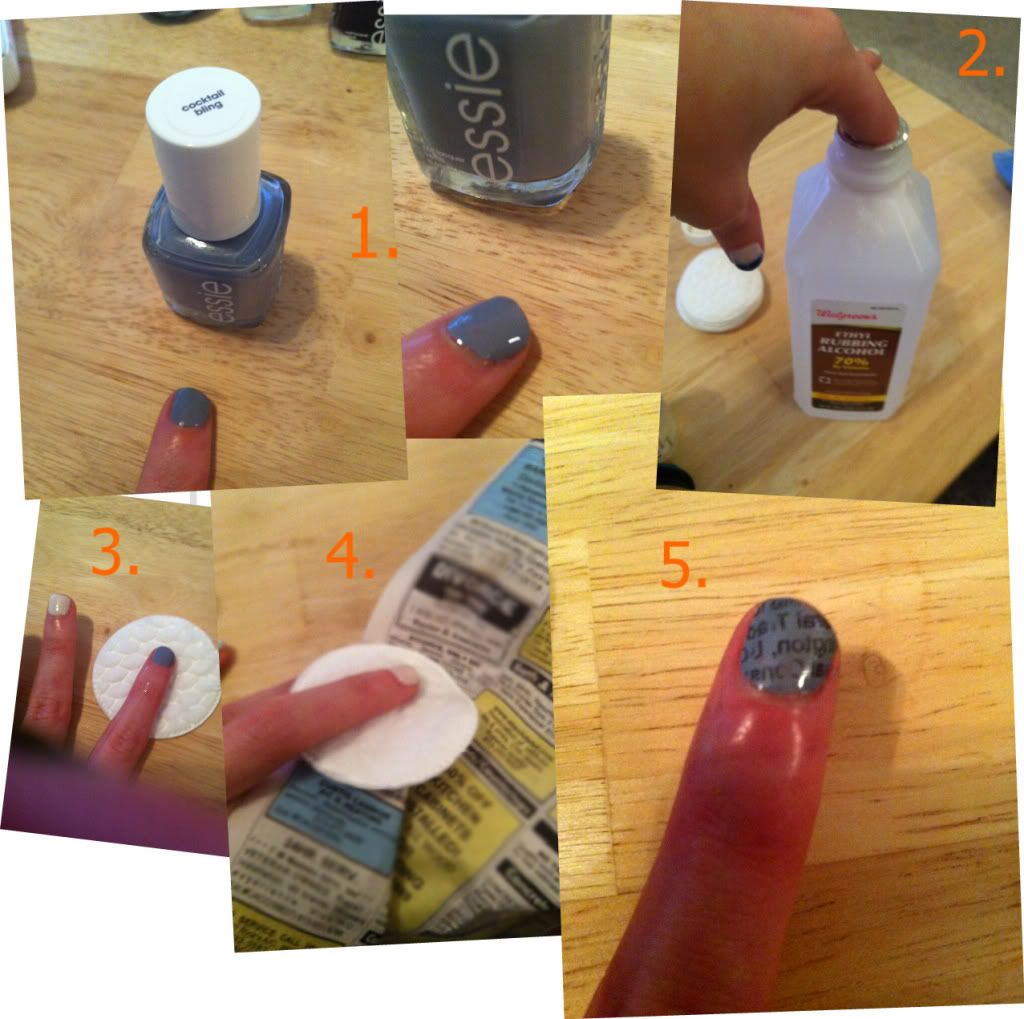
Newspapers on my nails? Informed & Innovative!
1. paint the nail and let it dry.
2. hold the painted nail in rubbing alcohol for about 30 seconds.
3. immediately place the newspaper over the nail for about a minute and a half. (i also held a second pad with alcohol over it to ensure transfer).
4.cover with a topcoat!
Hues o' colors-Paint me a rainbow!
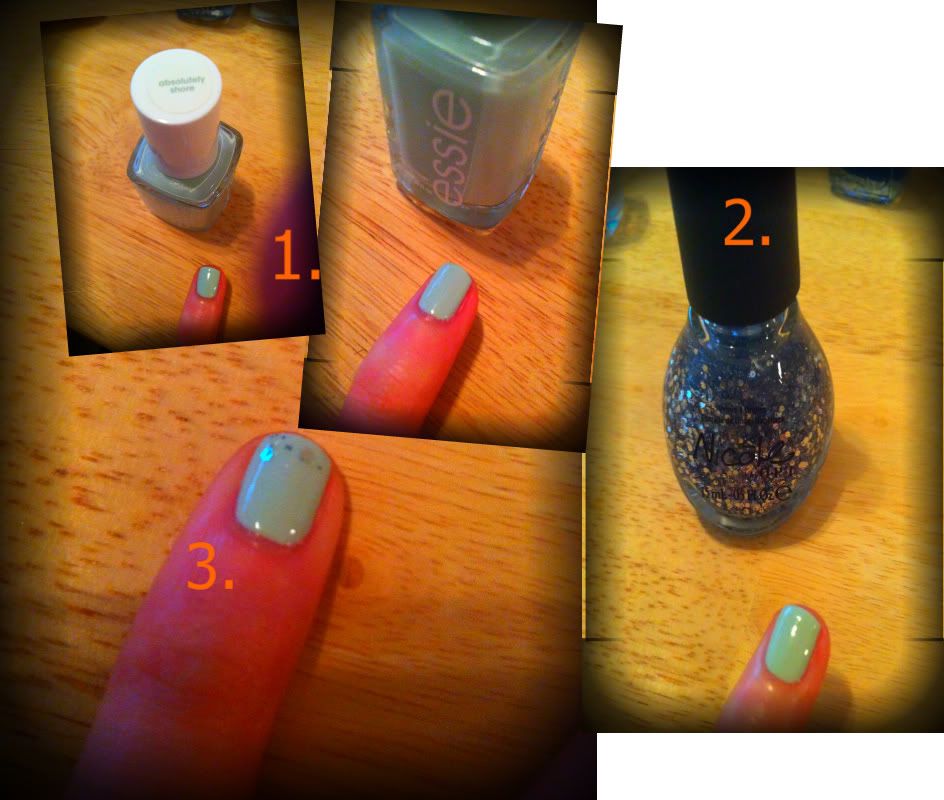
Way before time, or even last fall, blacks and blood-drawn reds used to rage the nail market. Whelp, move over black market, this year we are welcoming all races of colors. Alas, we have fallen in love with the introduction of Mint!
1. paint the nail and let it dry.
2. take the glitter nail polish and dab a few sparkles on the end of the nail.
3. paint a topcoat!
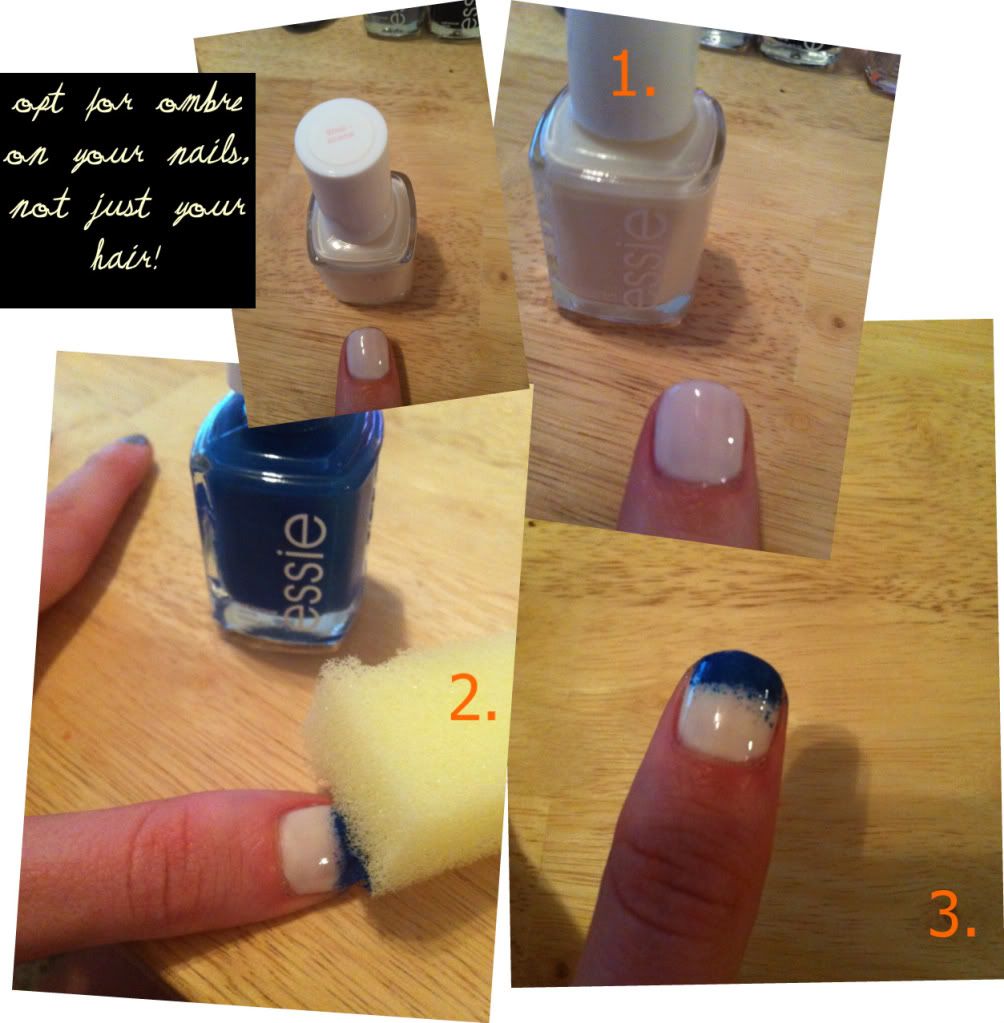
Paint me a mix o match!
Loving the duo dashes of color? Nail art is all about mix matching of colors and prints. Just grab a makeup sponge and a few colors of polish!
1. paint a base color and let it dry.
2. take a sponge and dip it in the second color.
3. dab it on the tip of your nail - thicker at the very tip, and then sponge and blend down the nail as desired!
Aztec Loving
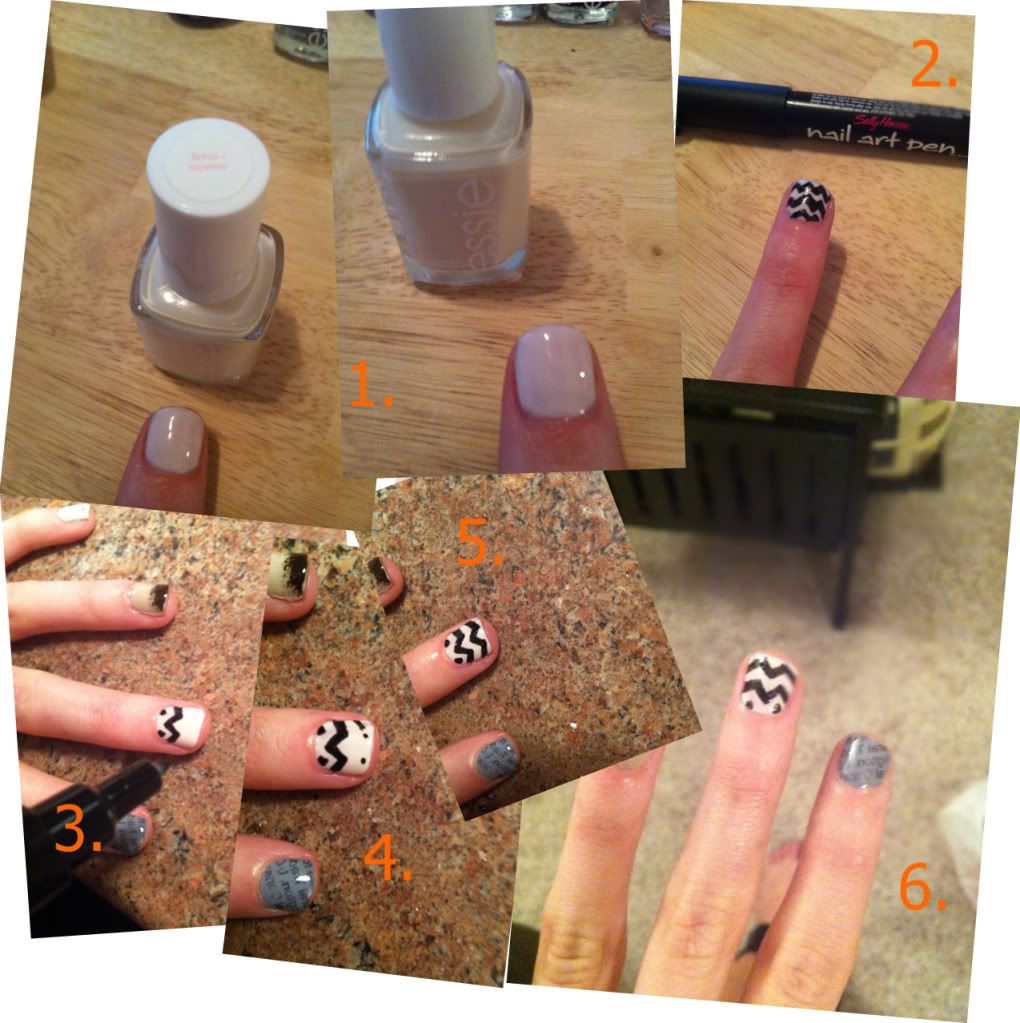
Aztec prints are everywhere. You've seen them dance their patters upon celebratory skirts and blouses this past summer and they certainly haven't disappeared in the winter wind. While we admit we cannot paint the beautiful colored Aztec landscapes on our nails, there are a few ways to get this Aztec feel on your nails that are doable without hiring a nail tech (just a nail pen)!
1.paint a base color - i used limo-scene by essie. marshmallow is another good white by essie! do NOT paint a top coat after this step - the nail pens adhere much better to the actual polish.
2.horrible example of my first attempt at this! (proof that practice makes perfect)
3.use a nail pen to draw a zig zag pattern on your nail.
4. i found it easiest to paint dots where i wanted the high and low points to be, and then connect those.
5.let it dry completely - be careful with this, because the nail pens are really easy to smear if you are hasty with the top coat.
6. paint a top coat and admire your work!
Impressive ideology:
get creative - nail art is just another form of fashion expressionism. use your favorite colors and designs for inspiration!
i also think it's important to point out that you may not get it perfect on that first try - proof being that the first time i tried out the zig zag stripes, it was terrible! i even included the picture in the collage above as proof. just keep trying, and you will get better and better!
topcoat:
we are in double LOVE with this topcoat. Not only does it quickly dry your nails, but it helps keep nails chip free for a period of at least a week or more - pretty good for a DIY manicure (especially considering im OCD about doing dishes).
nail care:
taking good care of your nails is mas importante. The most important tools are cuticle oil and moisturizer (you could also sub in some olive or almond oil). Remember, your hands are one of the places us ladies start to age first, so it's very important to keep them moisturized!
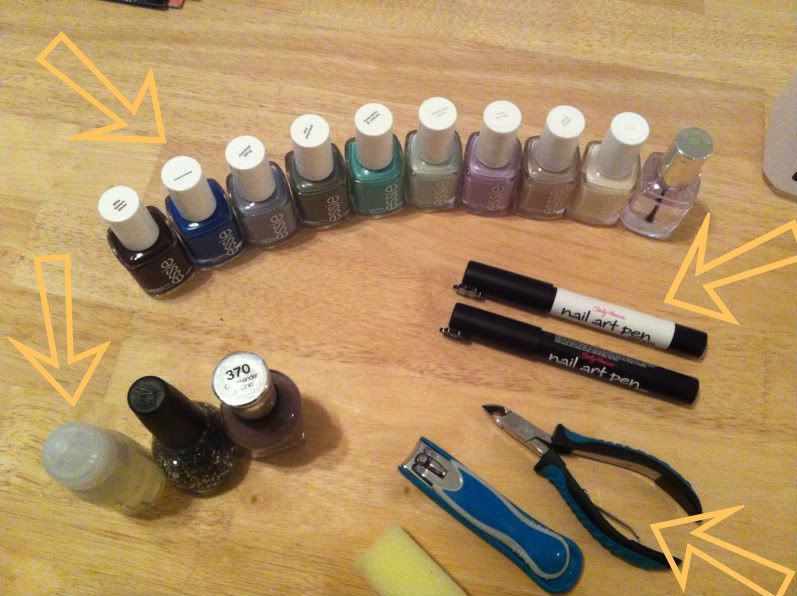
1. we love essie nail products (obviously) - their colors paint on thick, have an endless amount of colors to choose from, and they are sold at Target!
2. cuticle oil is a must - this helps those unruly hang-nails and keeps nails looking like you stepped out of the salon.
3. Sally Hansen nail pens are a great tool for nail designs. They are about $8 a piece, and I have found that they last a while as well!
4. cuticle trimmers are also quite important - these help keep your cuticles nice and neat, and this only takes a few seconds to do!