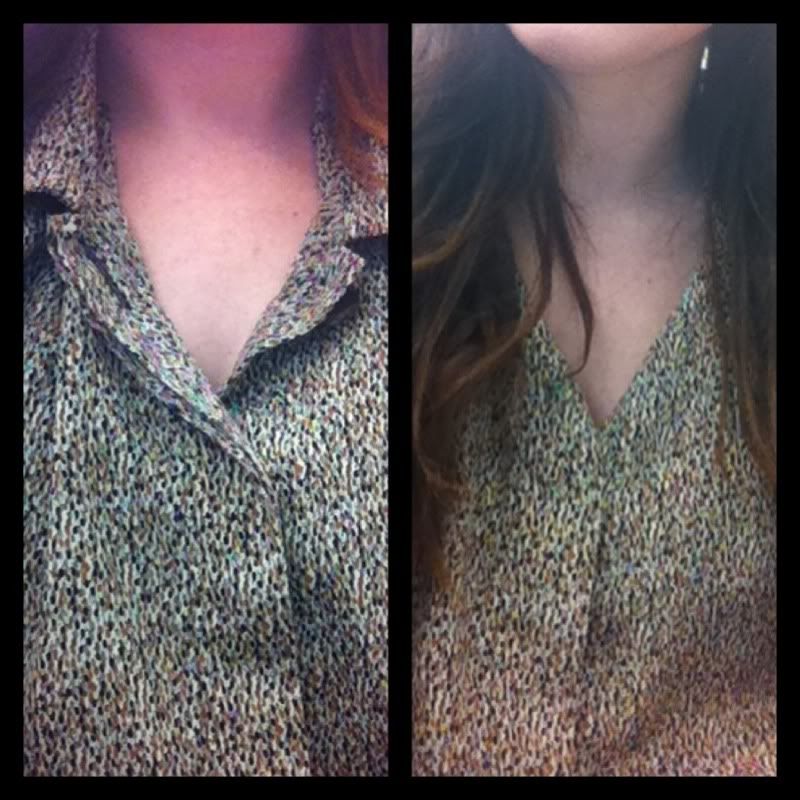
Leaving work heavy heeled to the first open bar? Look a bit more relaxed and tuck that collar in for a more flirty feel. It can give you a lower neck line while completely changing the look of your outfit.
This also works well with outfit repeating..
Give it a tryyyy.
Tuesday, January 31, 2012
Monday, January 30, 2012
Youthful lookin' YOU
..long were the days that our faces would factotum a fadaise of foul play. With spring coming up, its all about the fresh faced fun. But, lets be honest...we arent all blessed with flawless skin. Here are some of the tricks we use to ignite a glowing conflagration.
We opted to shy away from photoshop just for you..
Oil of Olay: Before I begin anything i ALWAYS ALWAYS apply a non comedogenic lotion all over my face. My mom has always used oil of olay, so I suppose it was genetically gifted to me as well. I use Oil of Olay Complete All Day UV moisturizer for normal skin with SPF 15. Ill let this sit for about 5 minutes or until its nearly dewey, while the skin absorbs the lotion's vitamins.
MAC Prep + Prime Fortifying Skin Enhancer: Yes, Im fortunate enough to have a beautiful sister as a makeup artist for MAC and she always points me in the right direction. Until using this miracle worker, I found that my makeup started caking around my checks and nose area throughout the day. MAC has completely eradicated that issue. This primer goes on just like lotion and literally makes my skin look flawless for days-if I decided to leave it on for that long. Ill let this sit for just a few minutes before applying my makeup.
Bare Minerals: Depending on the day- if im running errands or attending a party (which is rare), ill either just use mineral veil or their loose powder/foundation. I obviously use the color "fair." For those of you with sensitive skin or irreconcilable breakouts, I would really recommend switching over to mineral makeup. Its much lighter on skin and can decrease your number of breakouts.
MAC Pigment-Bright Fuchsia Frost: Now here is my secret. Instead of using a matte blush, I opt for loose pigments or shimmery colors on my checks-wether those be shadows or blushes. MAC's bright fuchsia is something I think I could not live without. It definitely gives me that glowing pop I need to have on my fair face. Find this survival gem by clicking here.
After I complete my founded new look, if I see that my makeup doesnt look a la natural I do one of two things; 1. I will take a blowdryer on low heat and blow out my face for a few seconds. This allows my face to absorb the makeup as opposed to having the makeup just sit on my face. If im feeling energetic, Ill do a few jumping jacks, squats, or sit-ups to get the blood pumping.
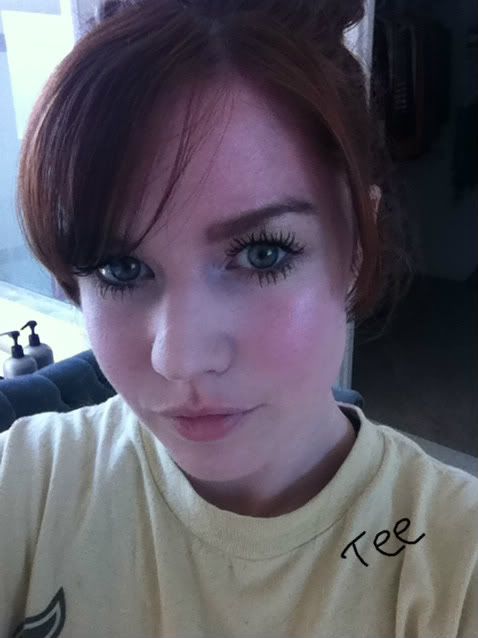
Eyes: My shadow colors vary day to day but for the sake of being consistent, ill tell you what was used in this picture. I normally like to mix matte colors with shimmer. However, for a glowing face, I prefer shimmer on eyes. In this picture I used TooFaced fashion on the base of my lid. On the inner corner of my eye, I used Nude Beach and followed under my eyes with that color as well. On the outer corner of my eye I used Honey Pot--all colors by TooFaced, which came in an amazing palette (Natural Eyes Collection) given to me by a wonderful TooFaced rep. This has become my new obsession and I recommend any girl to buy this. These browns are perfect for ANY face. I topped off my look with TooFaced Size Queen mascara. To make this look more drastic (a la day to night) try adding Urban Decay black pencil liner into the mix. MAC engraved and smolder are also a few of my favs.
Friday, January 27, 2012
Oh, The Marvels of Mascara...
Two Items that we both have agreed we could not live without are chapstick and MASCARA.
Mascara can easily make or break a fresh faced look. However, why is it that the perfect mascara for our eyes has yet to be found?
Check out our favorite lash go to reviews:
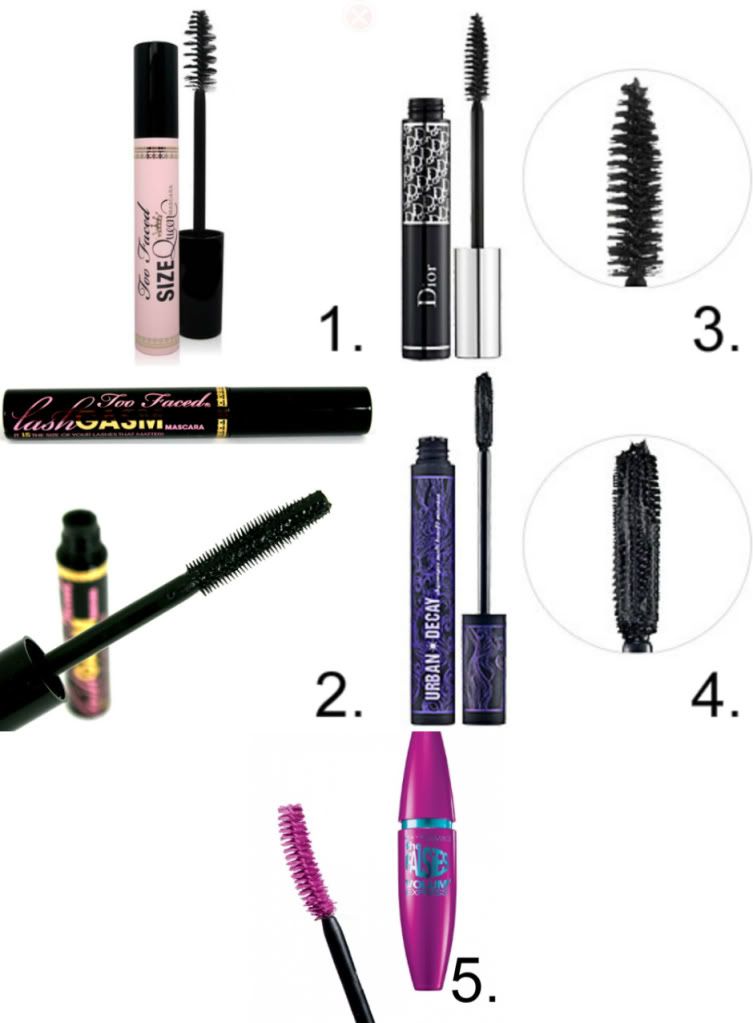
1.
Too Faced Size Queen (Sephora, $21)
Tee: I love this mascara mainly because it makes my lashes look natural. It never hardens no matter how many layers I put on, its dark and thick but appears light and and airy. Size queen provides a full look as well as elongated my lashes at the same time, which I find to be a combo rarity. Things to look out for: The wand on this bad boy is HUGE. Im talking HUGE. It will take some time to learn how to apply this mascara on your lashes. This may not be the best fit for those of you will short or thin lashes. However, for those of you with lashes that resemble mine, it is impossible to catch the spider syndrome with this mascara. I love using Size Queen with just a loose powder on my face. I let the lashes do all the talkin'.
Too Faced LashGasm (Sephora, $21)
Tee: LashGasm is my go to when im experiencing stubborn lashes. The wand is tiny and detailed. This is PERFECT for exposing every bottom lash. The mascara is gentle and super black! Things to look out for: May slightly harden lashes.
3.
Christian Dior DiorShow (Sephora, $24.50)
Ash: This mascara is my all time favorite. It never makes my lashes hard, but curls and adds length and volume to my rather spares lashes. It's super hard to get my lashes to curl, but this mascara effortlessly makes my lashes look amazing! Downside: Expensive, but worth it!
4. Urban Decay Skyscraper (Sephora, $20)
Ash: This mascara has a great brush for definition. I use it in combination with Falsies to prevent my eyes from getting that spidery look. It works great for bottom lashes, and defines top lashes. Downside: Hardens lashes.
5. Maybelline Falsies (Drugstores, $6)
We can't always afford to indulge ourselves with a $20 or $30 tube of mascara, so this is what we use in combination with our favorites, or just to get us through a tight squeeze.
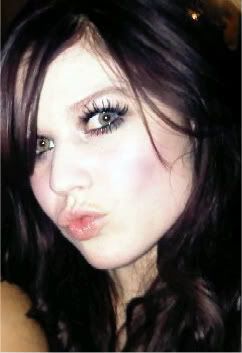
*It should be noted that that in case of emergencies (when we know we are being photographed or going out) we opt for luscious lashes. Yes, this may require a bit of spider syndrome- long, hardened lashes. For this look, I often refer to Maybeline's Define A Lash and double extension lash by L'Oreal. We first prime our eyes with double extension, then use the mascara side of the tube. Ill top it off with define a lash to get those last little centimeters I need to pull off a showcased look.
Reasons we dont use Define A Lash alone: The first few weeks of this baby are brutal! The mascara is thick, watery, and literally paints on ALL over our eyes! Yes, terrible. However, if you can withstand those first few weeks define a lash turns out all right. It may not provide you with the fullest set of eye strands, but it definitely elongates each strand-in time.
Mascara can easily make or break a fresh faced look. However, why is it that the perfect mascara for our eyes has yet to be found?
Check out our favorite lash go to reviews:
Too Faced Size Queen (Sephora, $21)
Tee: I love this mascara mainly because it makes my lashes look natural. It never hardens no matter how many layers I put on, its dark and thick but appears light and and airy. Size queen provides a full look as well as elongated my lashes at the same time, which I find to be a combo rarity. Things to look out for: The wand on this bad boy is HUGE. Im talking HUGE. It will take some time to learn how to apply this mascara on your lashes. This may not be the best fit for those of you will short or thin lashes. However, for those of you with lashes that resemble mine, it is impossible to catch the spider syndrome with this mascara. I love using Size Queen with just a loose powder on my face. I let the lashes do all the talkin'.
Size Queen used in picture.
2. Too Faced LashGasm (Sephora, $21)
Tee: LashGasm is my go to when im experiencing stubborn lashes. The wand is tiny and detailed. This is PERFECT for exposing every bottom lash. The mascara is gentle and super black! Things to look out for: May slightly harden lashes.
3.
Christian Dior DiorShow (Sephora, $24.50)
Ash: This mascara is my all time favorite. It never makes my lashes hard, but curls and adds length and volume to my rather spares lashes. It's super hard to get my lashes to curl, but this mascara effortlessly makes my lashes look amazing! Downside: Expensive, but worth it!
4. Urban Decay Skyscraper (Sephora, $20)
Ash: This mascara has a great brush for definition. I use it in combination with Falsies to prevent my eyes from getting that spidery look. It works great for bottom lashes, and defines top lashes. Downside: Hardens lashes.
5. Maybelline Falsies (Drugstores, $6)
We can't always afford to indulge ourselves with a $20 or $30 tube of mascara, so this is what we use in combination with our favorites, or just to get us through a tight squeeze.
*It should be noted that that in case of emergencies (when we know we are being photographed or going out) we opt for luscious lashes. Yes, this may require a bit of spider syndrome- long, hardened lashes. For this look, I often refer to Maybeline's Define A Lash and double extension lash by L'Oreal. We first prime our eyes with double extension, then use the mascara side of the tube. Ill top it off with define a lash to get those last little centimeters I need to pull off a showcased look.
Reasons we dont use Define A Lash alone: The first few weeks of this baby are brutal! The mascara is thick, watery, and literally paints on ALL over our eyes! Yes, terrible. However, if you can withstand those first few weeks define a lash turns out all right. It may not provide you with the fullest set of eye strands, but it definitely elongates each strand-in time.
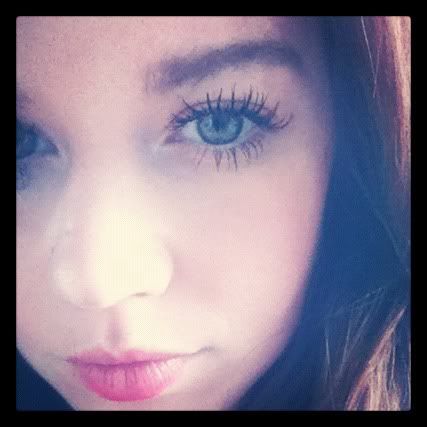
wearing Define-A-Lash and Double Extension
Subscribe to:
Posts (Atom)